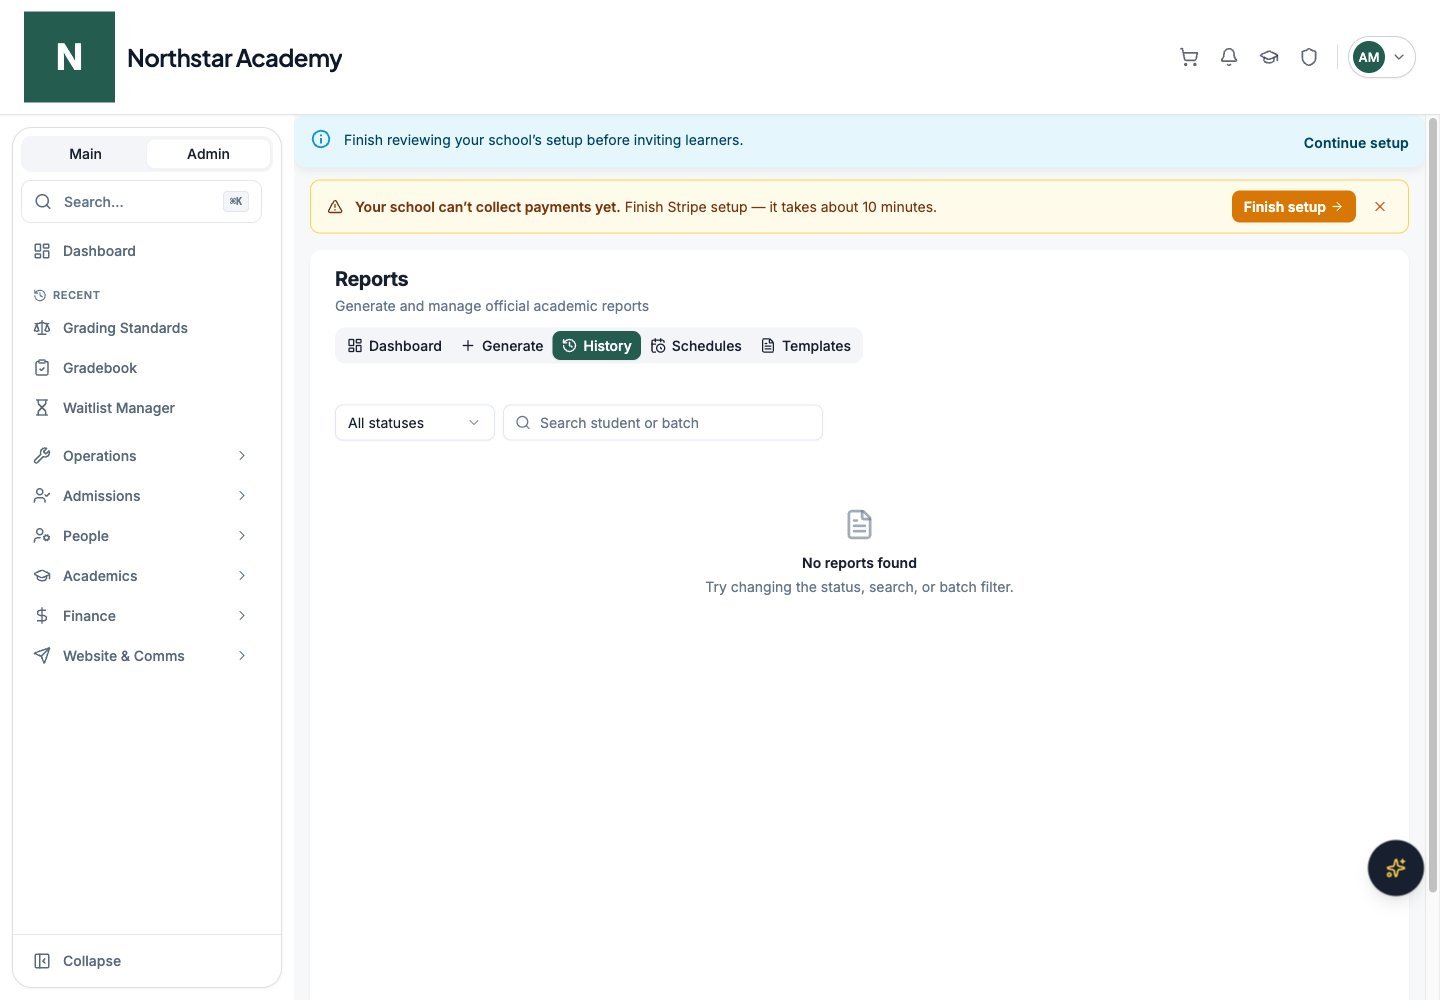
This walkthrough uses the real DeanDesk interface with the fictional Northstar Academy demo school and a calm, AI-generated English voice. Payments and outside services are not connected in the demo.
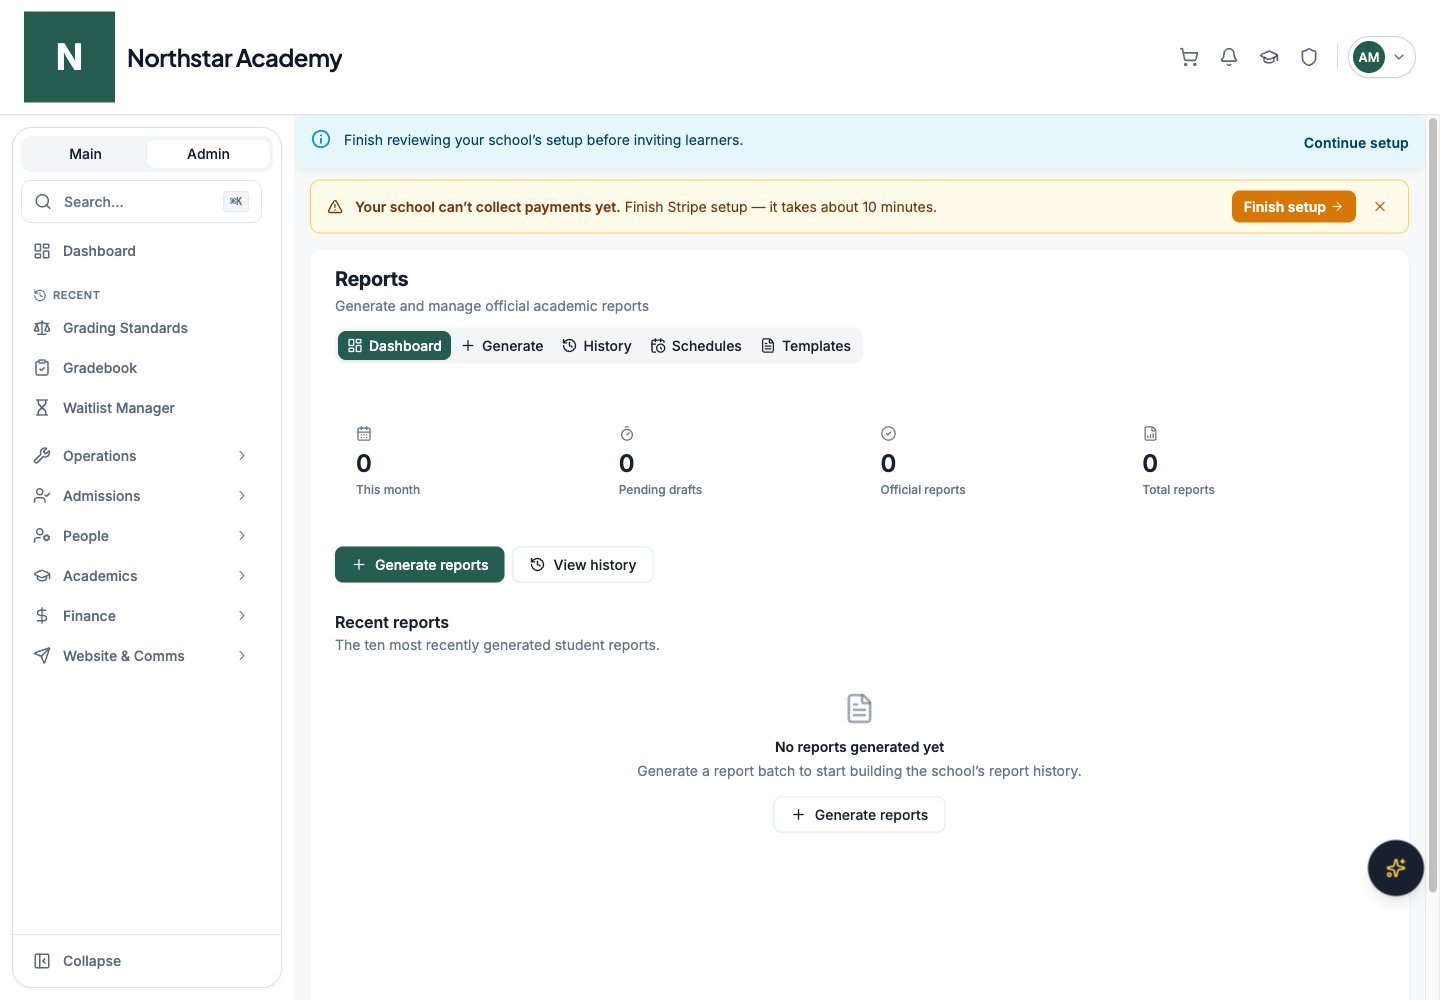
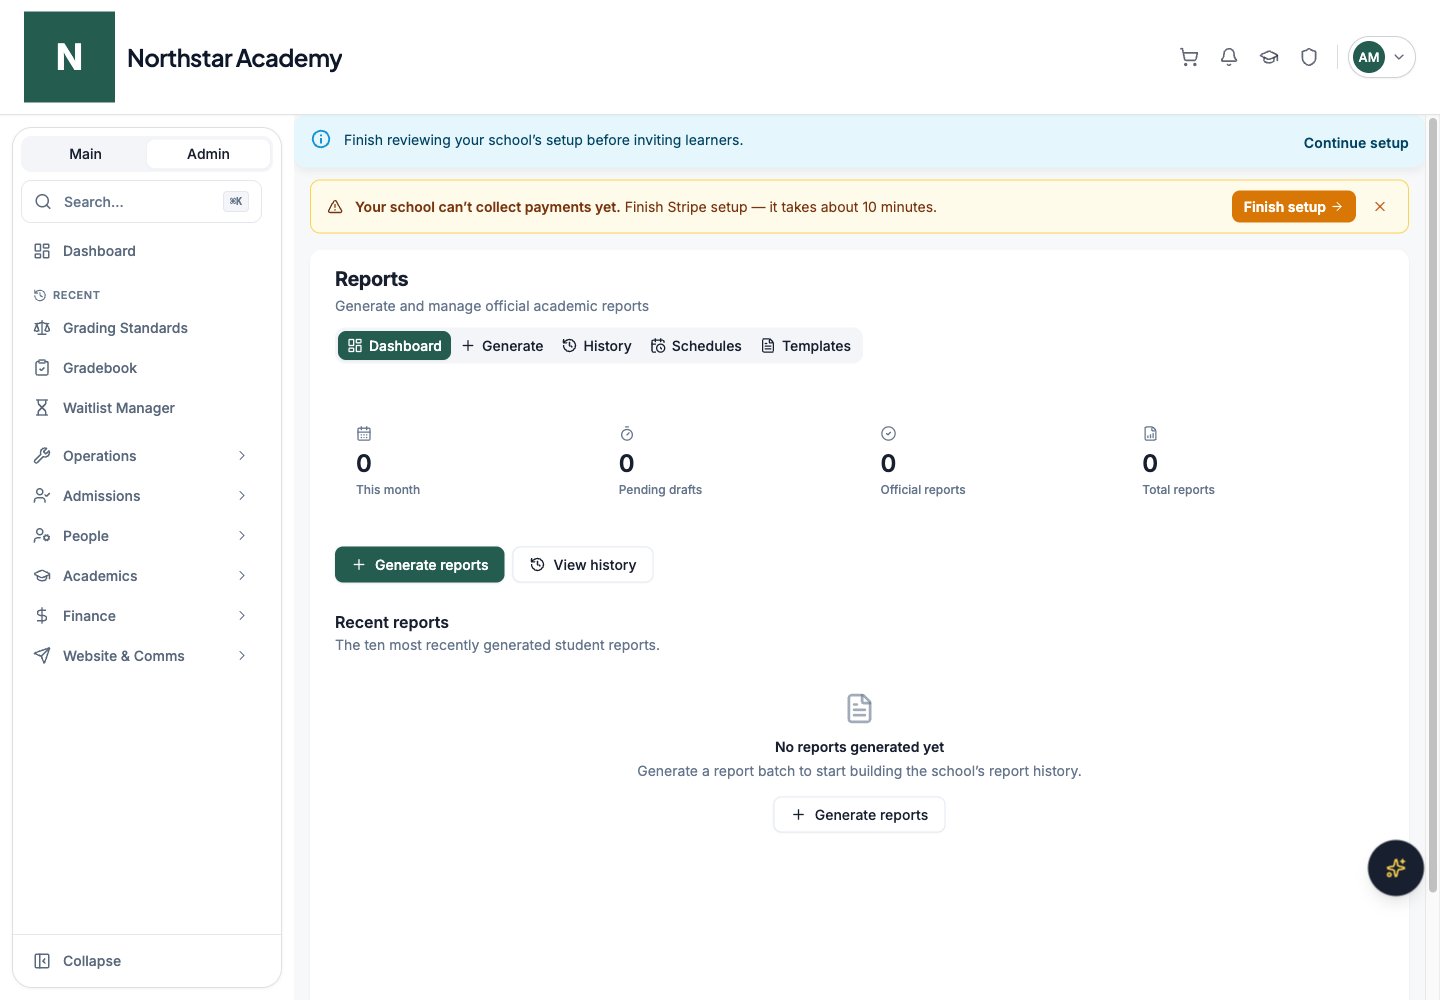
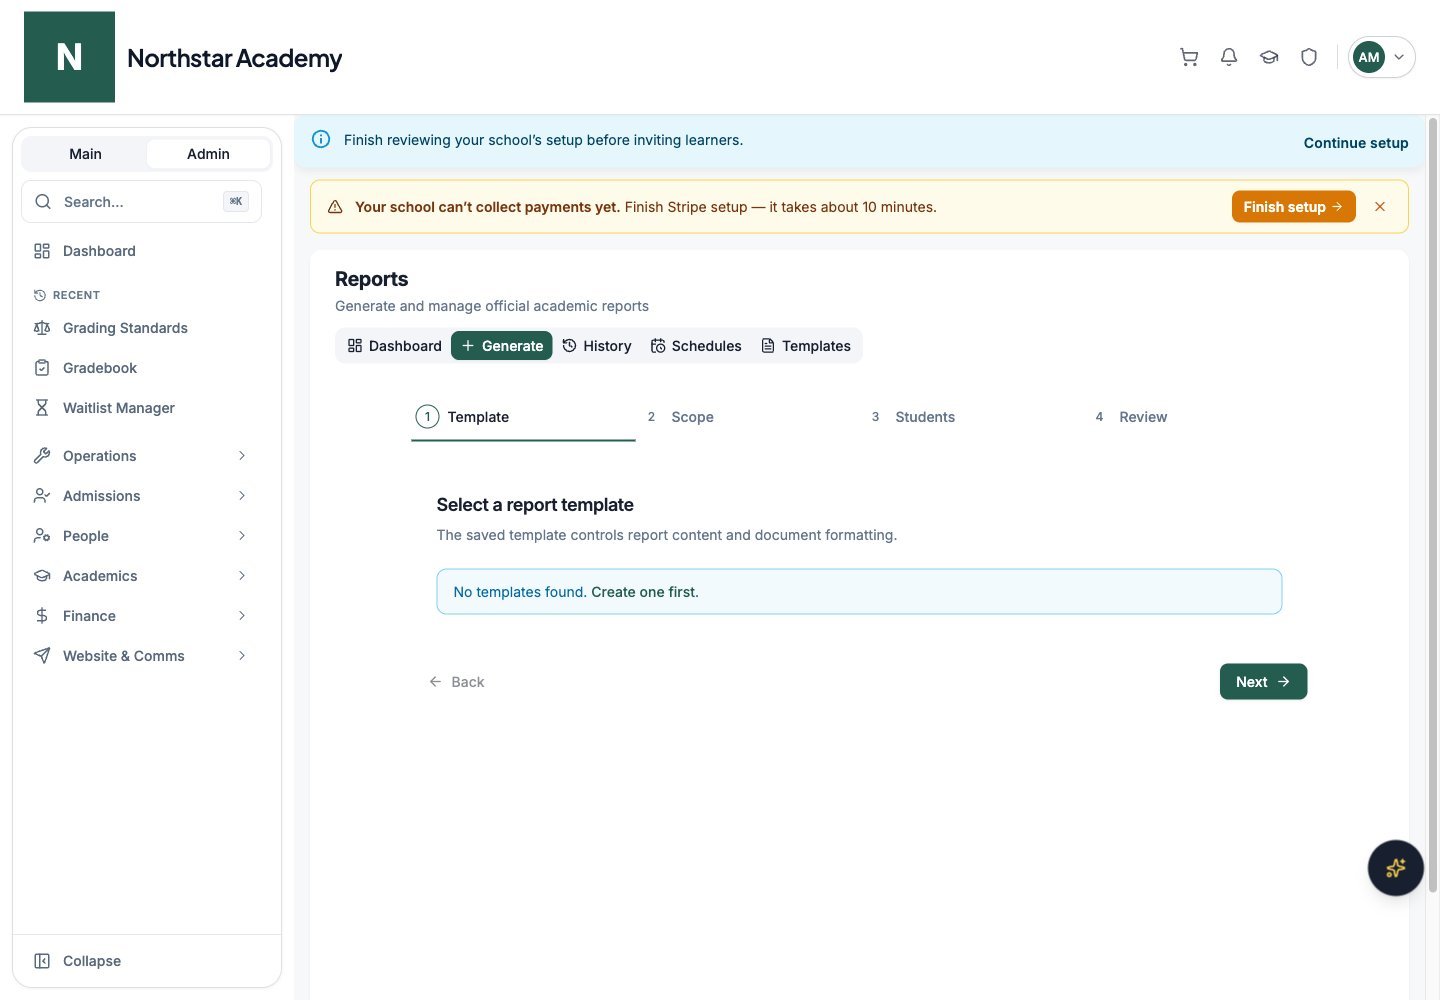
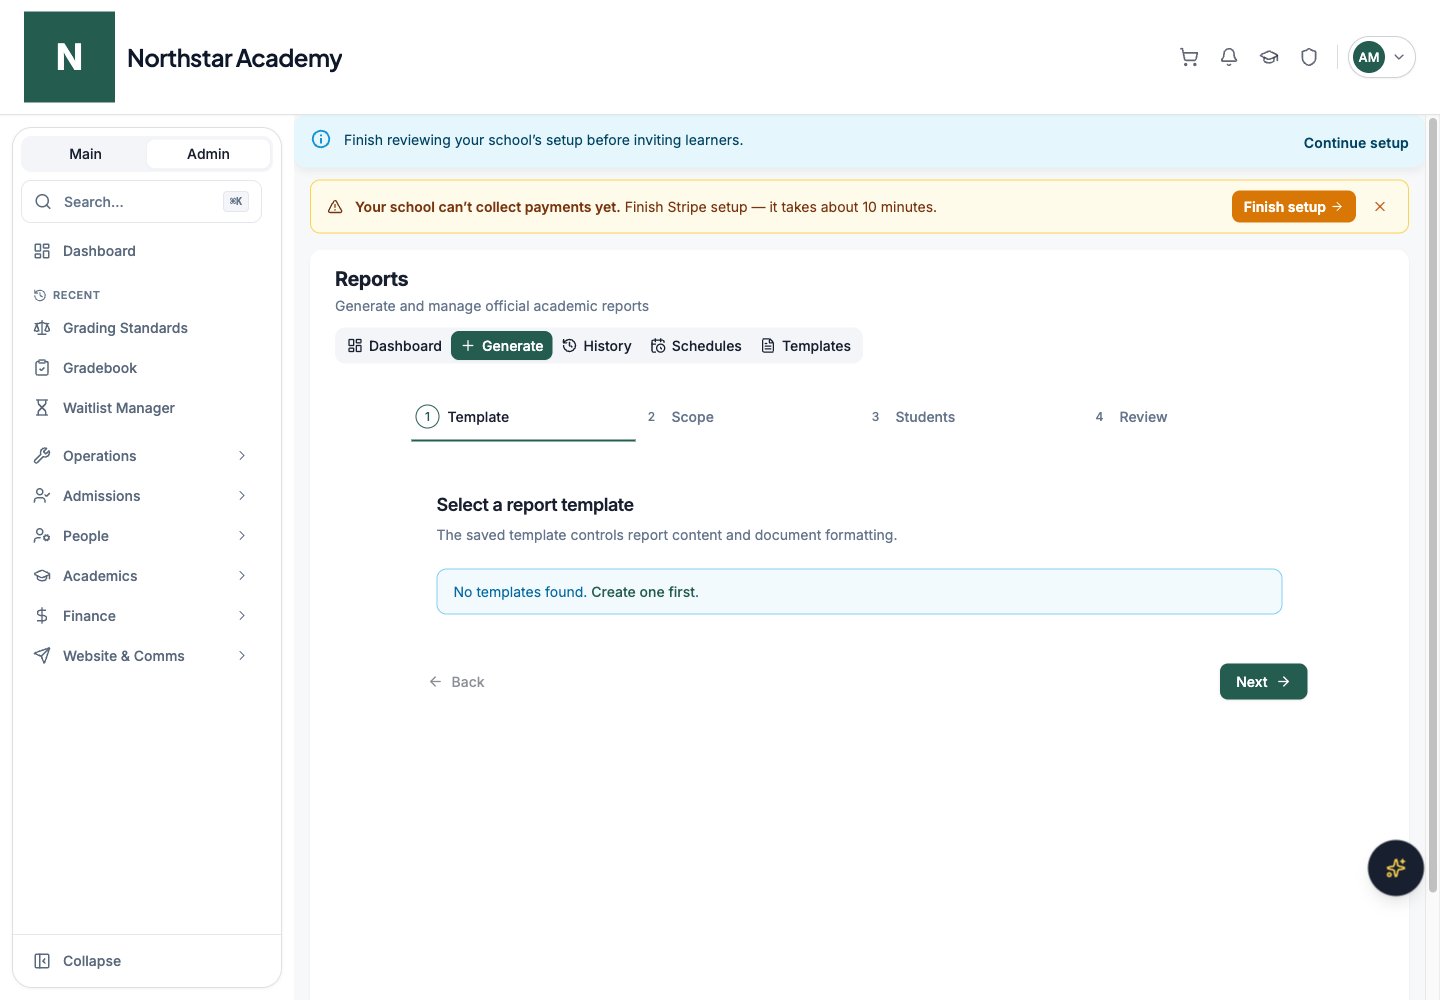
Screenshots use fictional Northstar demo data.Student reports combine academic information into a saved document for an individual student. Open Admin Dashboard → Academics → Reports to work with Dashboard, Generate, History, Schedules, and Templates.A template selects the content, including courses, grades, GPA, attendance, assignments, instructors, enrollment information, comments, and optionally disciplinary records. Choose the fields needed for a transcript, progress report, or internal review instead of selecting a separate report category.
Use Academic year and Term to limit the course data included. Use Course, Roster, and Enrollment status to narrow the student group. These are separate choices: limiting who receives a report is not the same as limiting the academic period on it.
3
Choose students
Review the matching students, search by name or email, and select the students to include. You must choose at least one student.
4
Review and generate
Enter a Batch name (optional) to help find the run later. Under Who can access these reports?, choose Student access or Internal. Review the template and selection, then click Generate N reports (the button shows the number of selected students). Manual generation creates drafts.
5
Review and approve
Open History, inspect each draft with View report, and click Approve when it is ready to become official. You can select multiple reports and approve them together.
6
Print or save as PDF
Open a report and click Print, then use your browser’s print dialog to print or save a PDF. For a batch, filter History to that batch and use Bulk Print.
A generated report is a saved snapshot. Correct source grades or attendance before generating the official version. Editing source data afterward does not rewrite an already generated report.
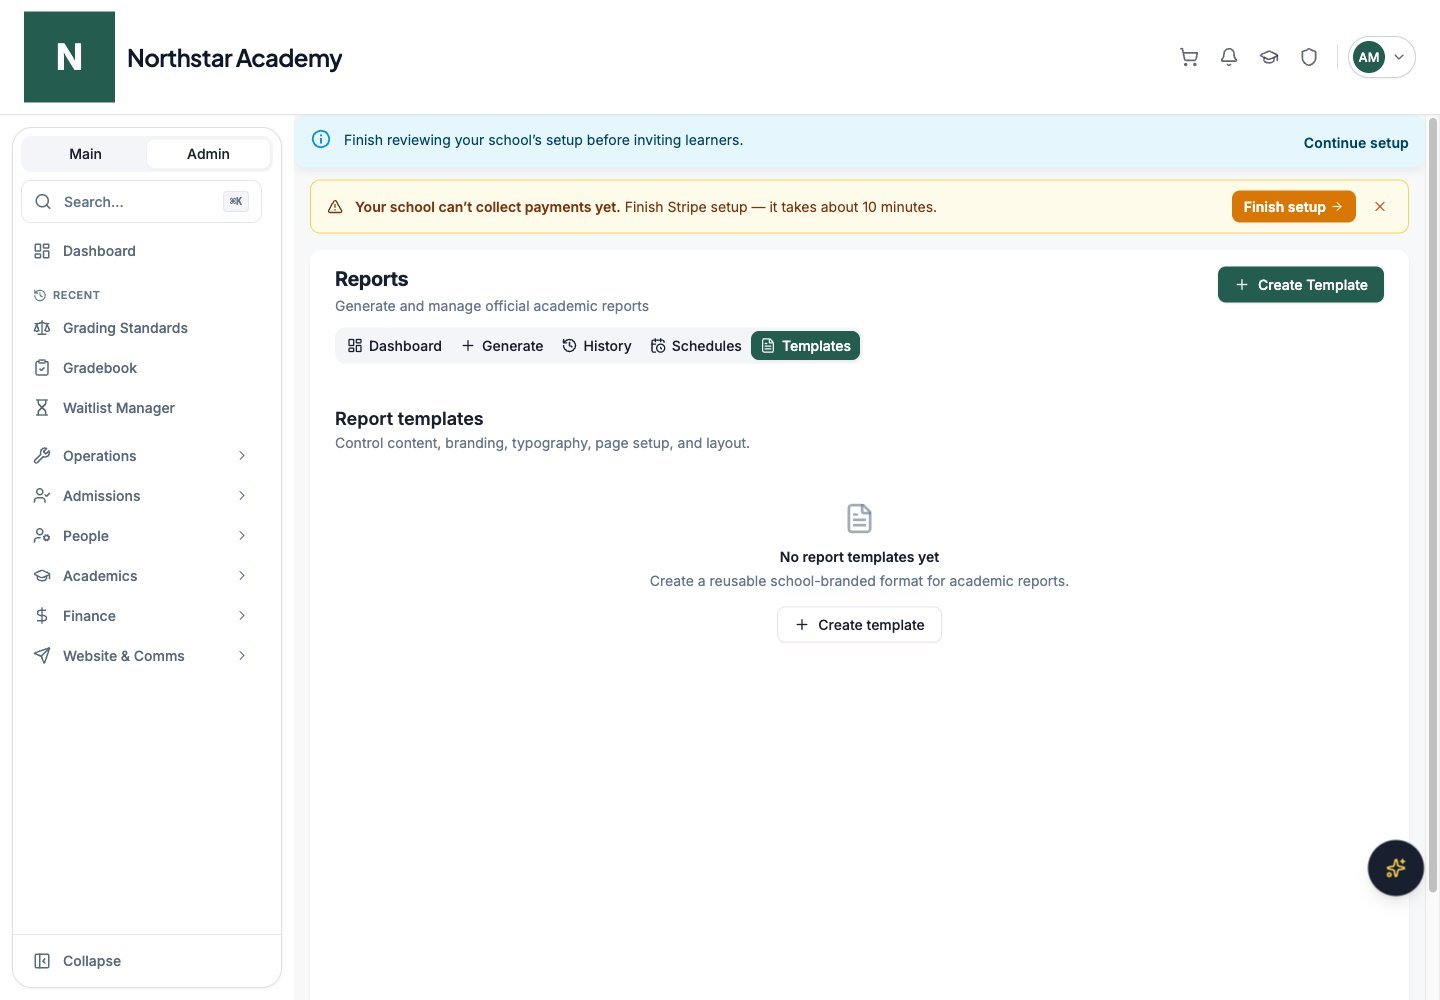
The Templates tab of the Reports dashboard is where you design reusable, school-branded formats for academic reports. When you generate a report — or set up a recurring schedule — you pick one of these templates.Each template card shows its name, description, font, paper size, and how many fields it includes. Click Create Template at the top of the tab (or Create template when no templates exist yet) to build a new one, or Customize on an existing card to edit it. Deleting a template does not affect reports already generated with it.
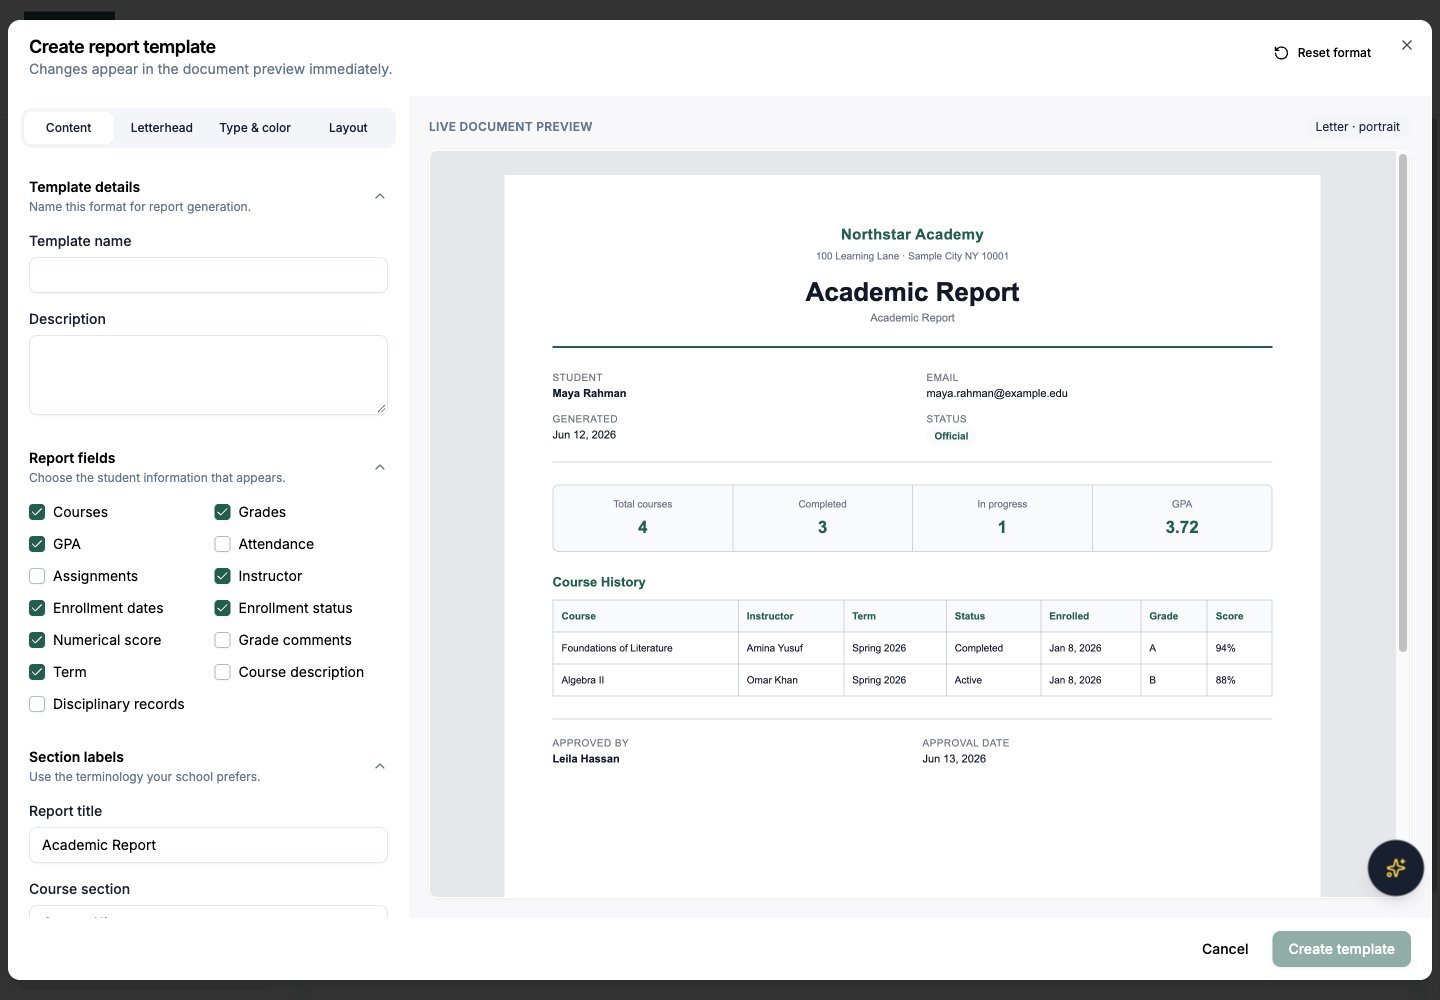
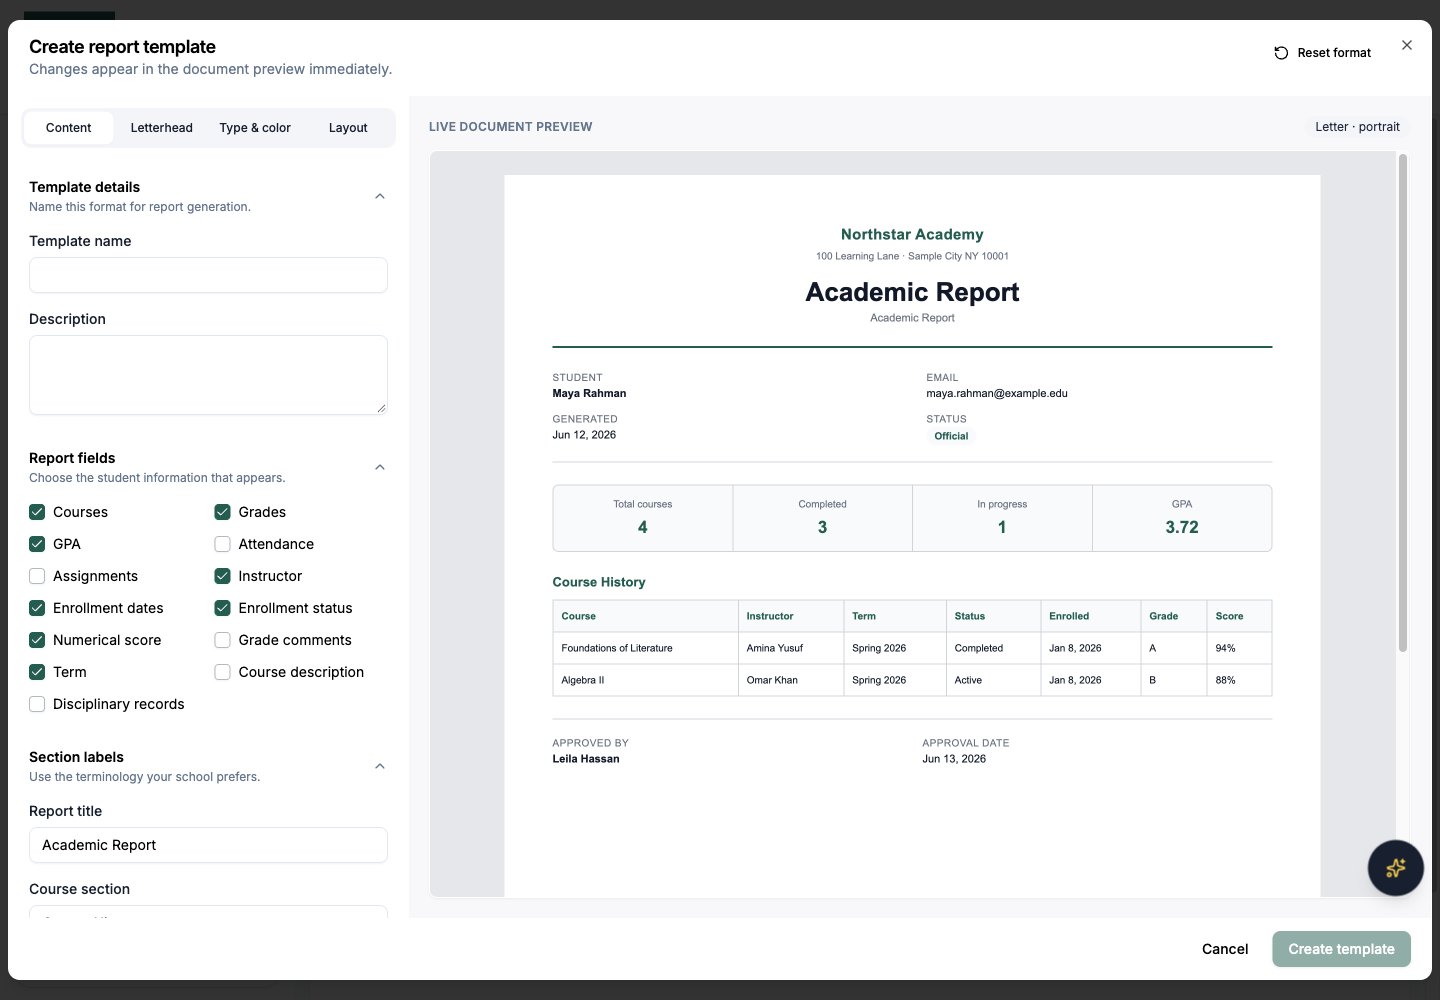
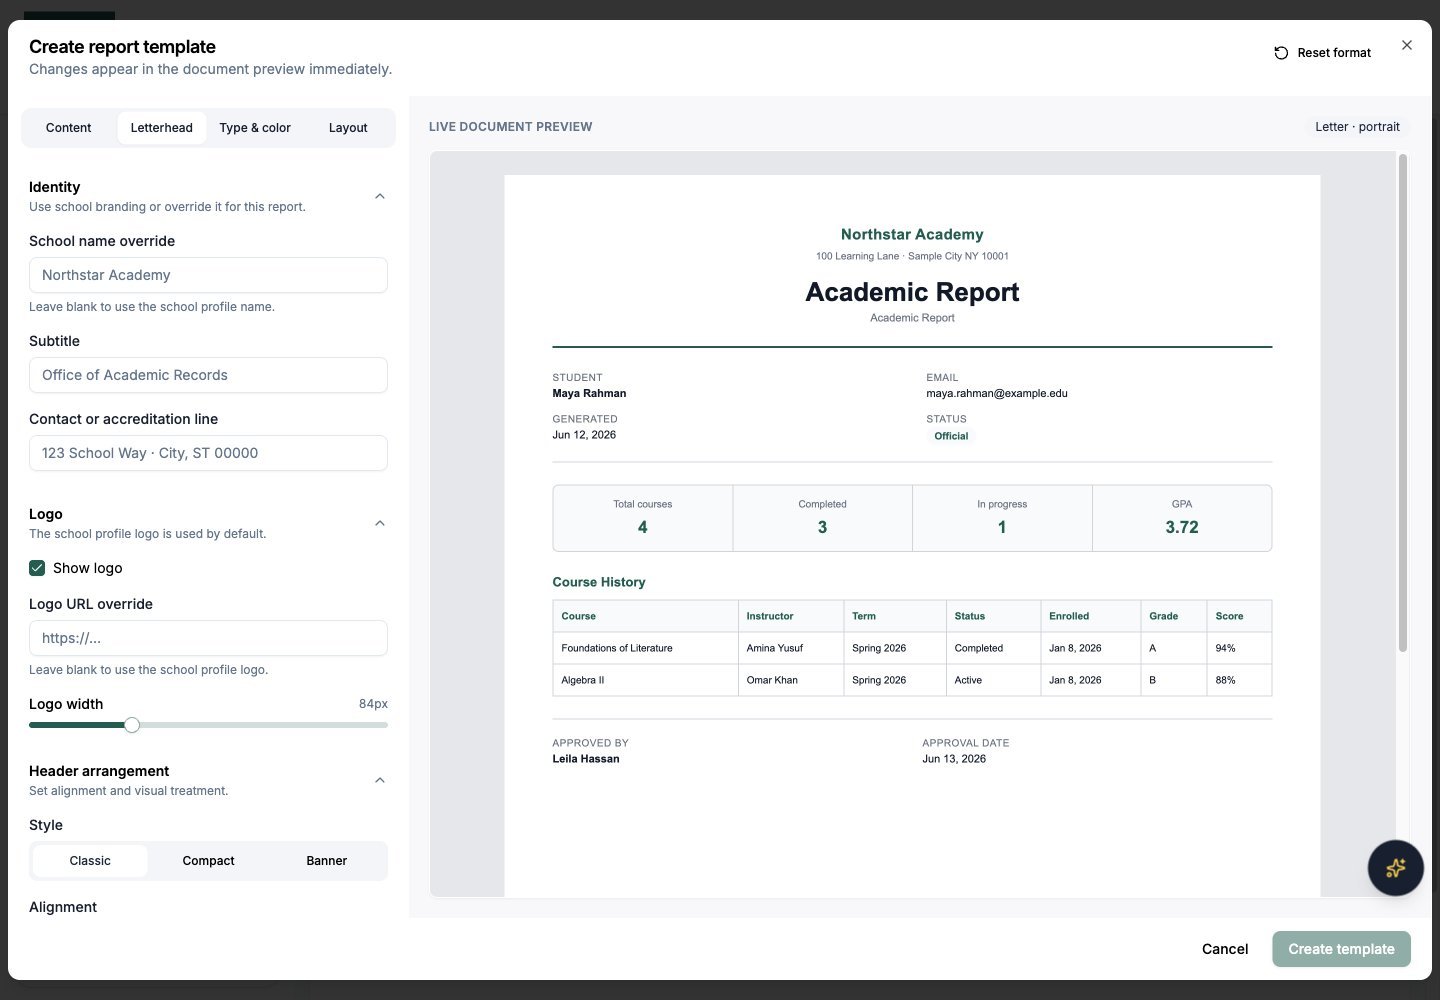
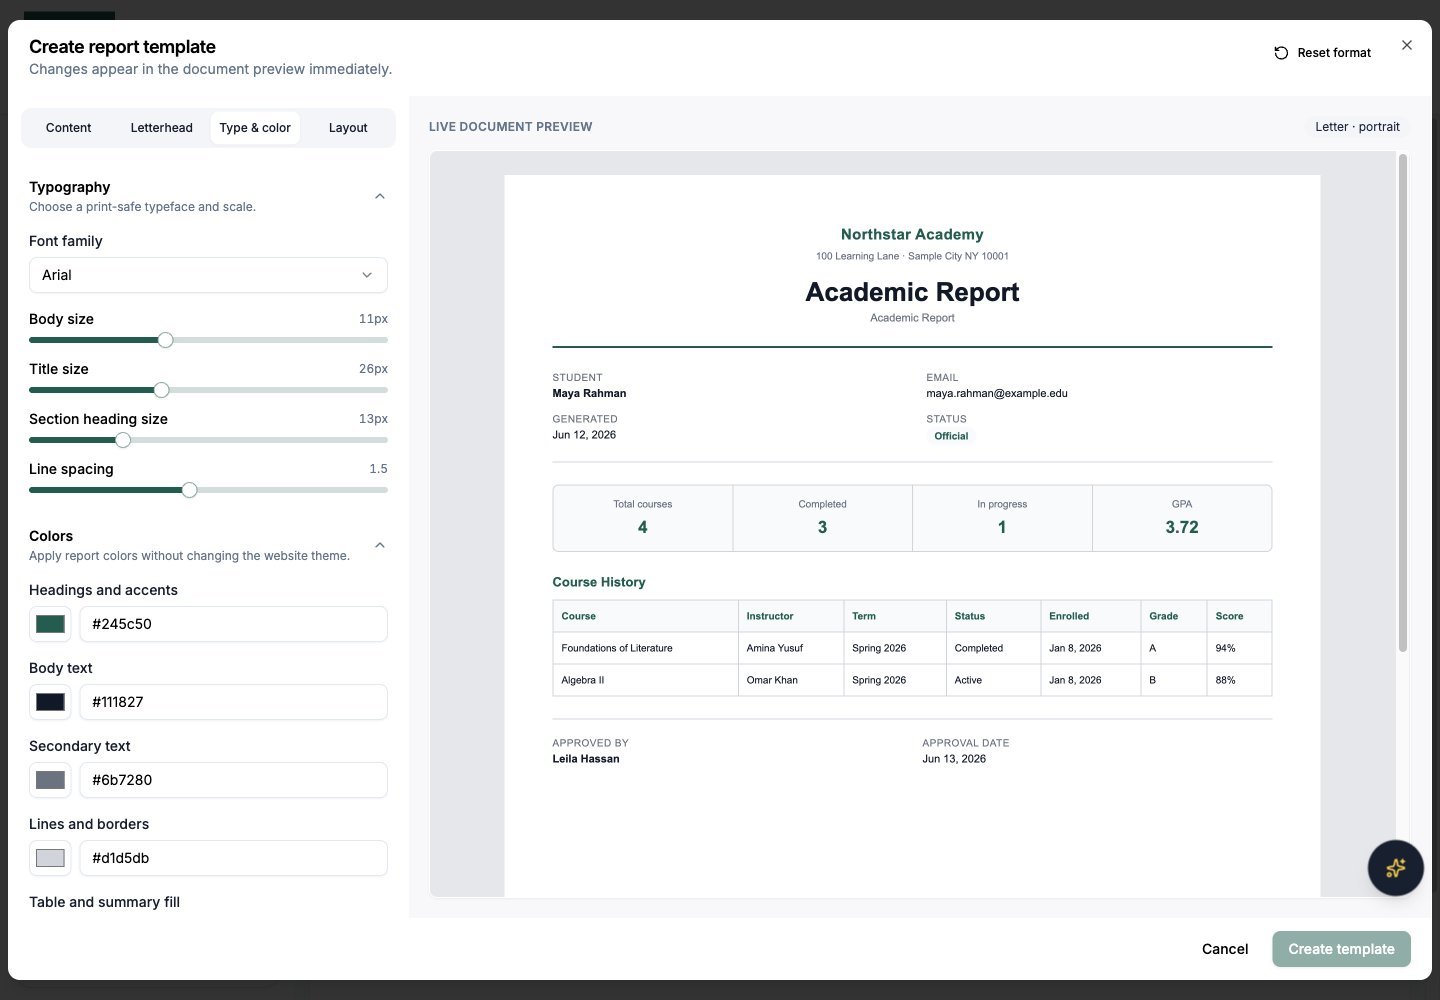
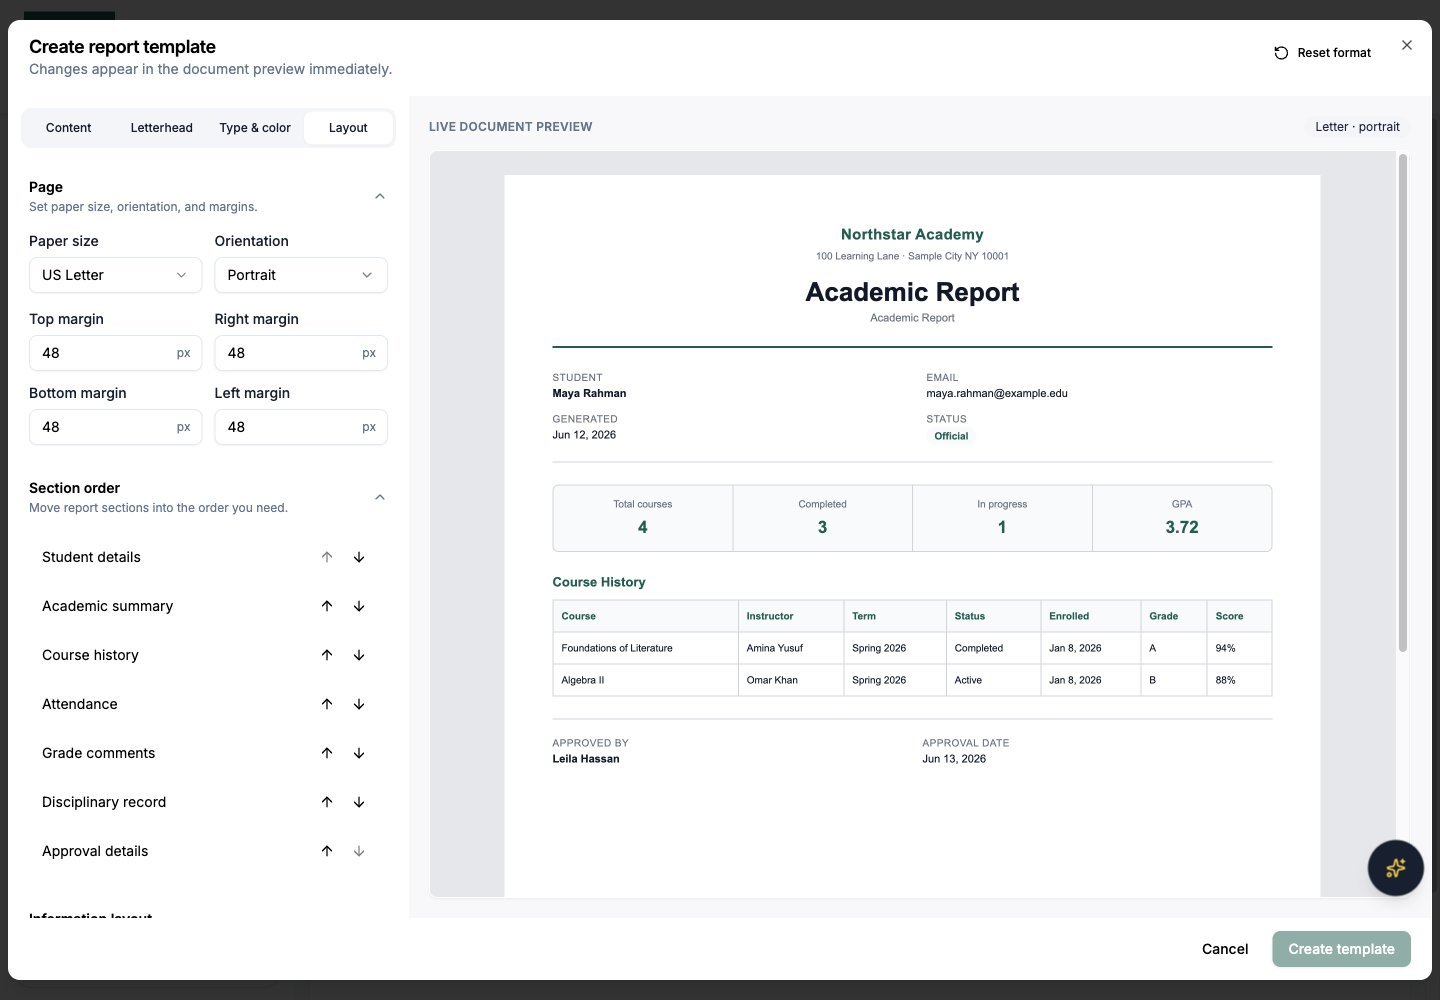
Creating or customizing a template opens a full-screen designer with editing controls on the left and a live document preview on the right — changes appear in the preview immediately. The controls are organized into four tabs:
Template details — the template’s name (required) and description.
Report fields — checkboxes for the student information that appears: Courses, Grades, GPA, Attendance, Assignments, Instructor, Enrollment dates, Enrollment status, Numerical score, Grade comments, Term, Course description, and Disciplinary records.
Section labels — rename the report title and the course, attendance, comments, and disciplinary section headings to match your school’s terminology.
Footer — set custom footer text, and choose whether to show the official/draft status and page numbers.
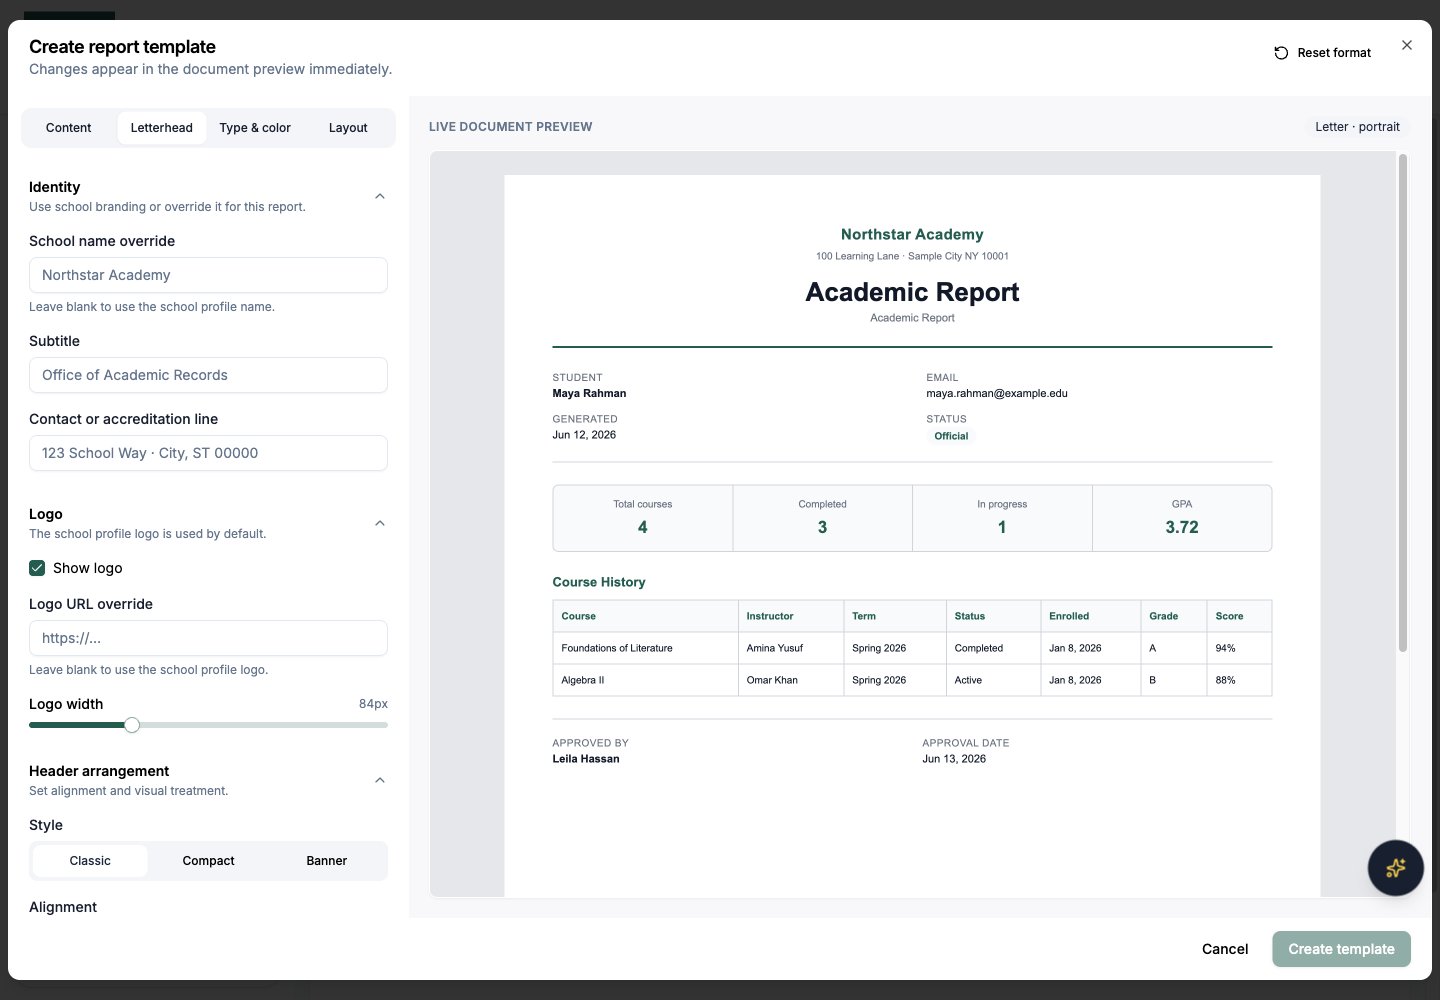
Identity — override the school name, add a subtitle (e.g. “Office of Academic Records”), and add a contact or accreditation line. Leave fields blank to use your school profile.
Logo — show or hide the logo, override the logo image, and adjust its width. The school profile logo is used by default.
Header arrangement — choose a Classic, Compact, or Banner style; left, center, or right alignment; and whether to show a divider under the letterhead.
Typography — pick a print-safe font family (Arial, Helvetica, Georgia, Times New Roman, Trebuchet MS, or Verdana) and adjust body, title, and section heading sizes plus line spacing.
Colors — set the colors for headings and accents, body text, secondary text, lines and borders, and table fills. These apply to the report only, not your website theme.
Northstar demo — Reports — Templates — Type & color
Page — US Letter or A4, portrait or landscape, and all four margins.
Section order — reorder the report’s sections (Student details, Academic summary, Course history, Attendance, Grade comments, Disciplinary record, Approval details) with the up and down arrows.
Information layout — choose the density, the academic summary style, the course table style, and whether student details use one or two columns.
Use Reset format in the designer header to restore all formatting to your school defaults, then Create template or Save changes to finish.
If you include Disciplinary records, the report includes all available disciplinary records for the student; academic scope filters only limit course data. These records become visible to students or guardians when the report is official and has Student access. The field also requires disciplinary records to be enabled in School configuration.
Every generated student report has an access level that controls who can see it. You choose it at generation time under Who can access these reports?:
Access level
Who can view it
Student access (default)
Admins can review it; the student and authorized parents or guardians can view it once official. The official report appears on the student’s Transcript page.
Internal
Only admins can view it. Internal reports cannot be emailed.
You can change a report’s access level at any time after generation — open the report from the History tab and switch between Student & family access and Internal · admins only. Reports in the History tab carry an Admins only or Student access badge so you can tell them apart at a glance.
Approving a report no longer notifies students or families automatically. Emailing is a separate, explicit step:
1
Open the History tab
Go to the History tab of the Reports dashboard.
2
Email one report or many
Click the mail icon (Email report) on a report’s row, or select multiple reports and use the bulk Email action. Emailing is available for Official reports with Student access.
3
DeanDesk delivers the report
Adult students receive the report themselves. For a child, the report is emailed to the child’s parents.
You can re-send a report at any time with Email report again. DeanDesk records who emailed it, when, and how many times it has been sent, and emailed reports show an Emailed badge in the History tab.
Internal reports cannot be emailed. Change the report’s access level to Student & family access first.
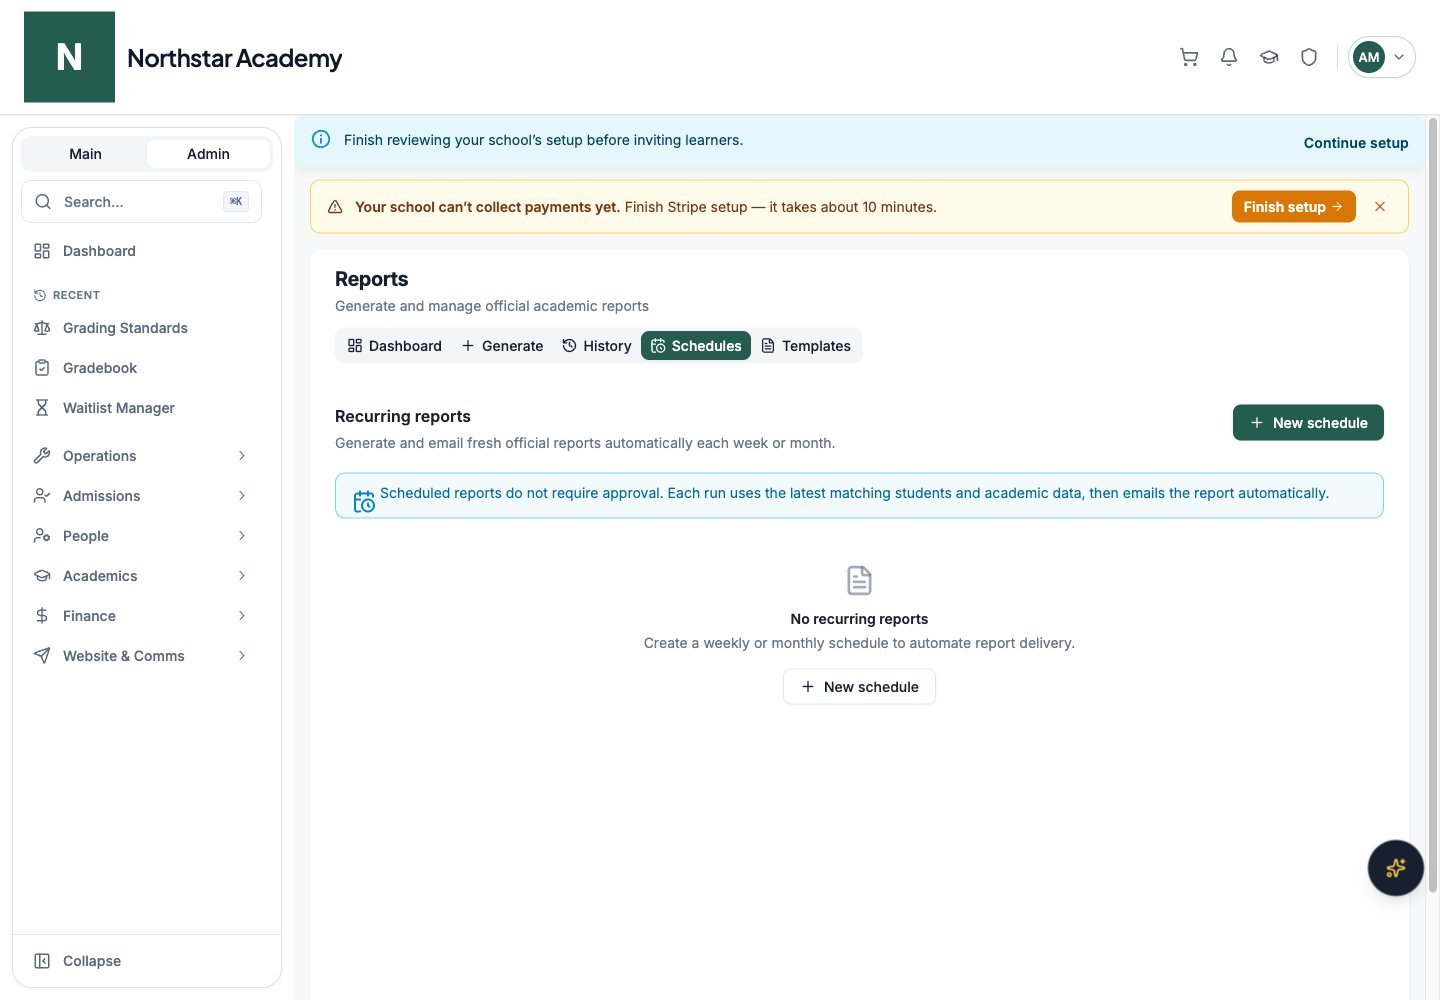
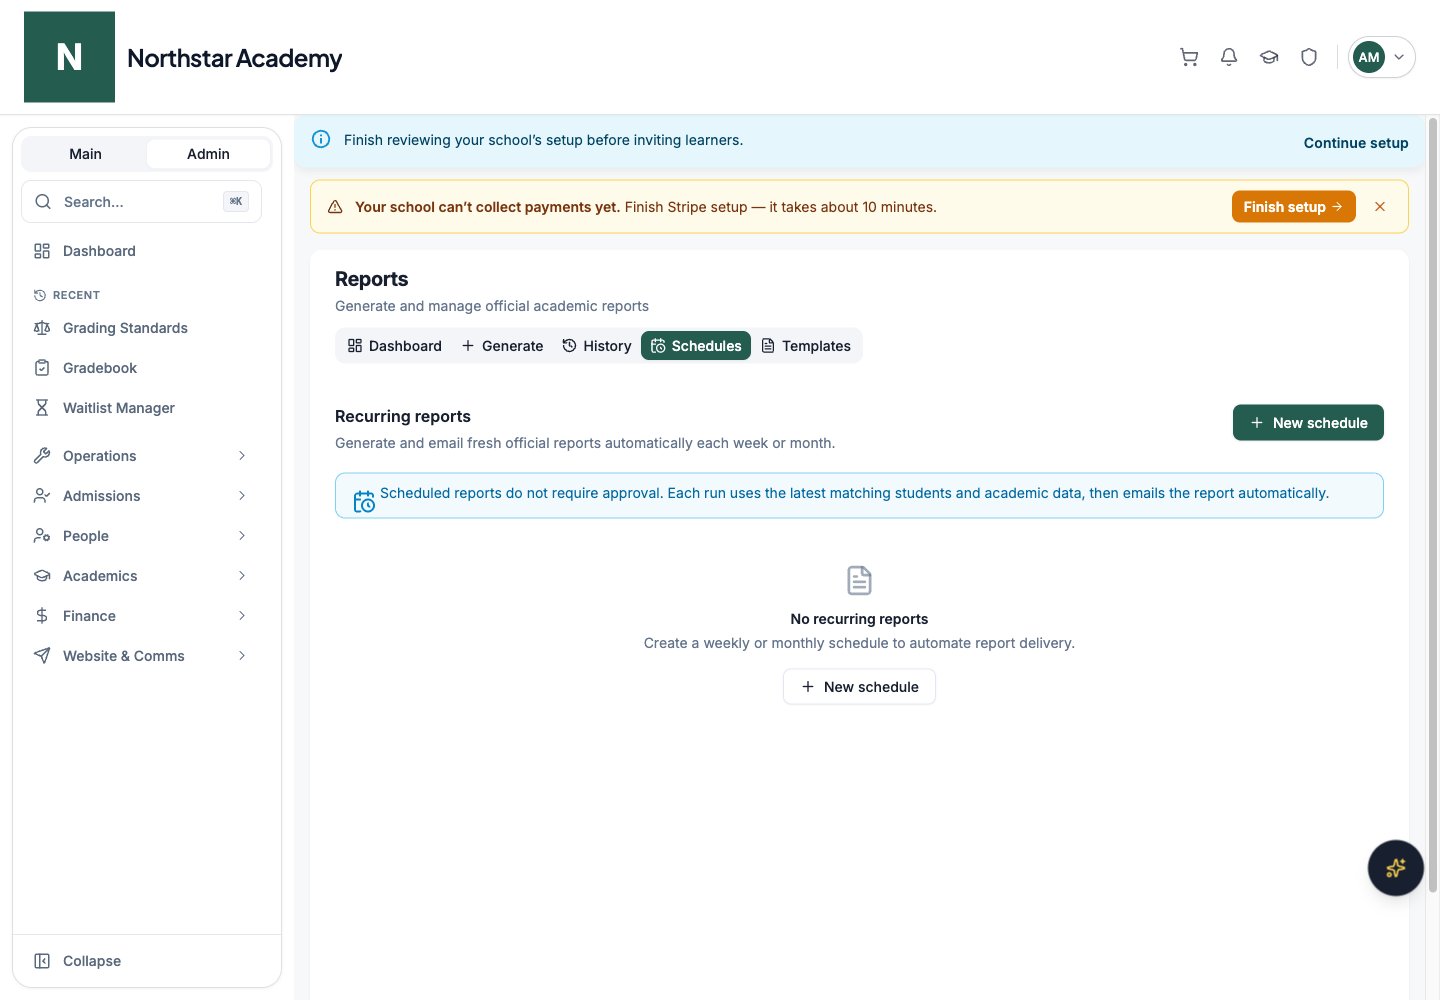
The Schedules tab on the Reports dashboard lets you generate and email fresh official reports automatically each week or month.
1
Create a schedule
In the Schedules tab, click New schedule.
2
Name it and pick a template
Enter a schedule name and choose the report template each run should use.
3
Set the cadence
Choose a Frequency of Weekly (pick a day of the week) or Monthly (pick a day of the month, 1–28), then set the time of day the run should start, in your school’s timezone.
4
Scope the students (optional)
Under Dynamic student and academic scope, filter by academic year, term, course, roster, or enrollment status (All, Active, Completed, or Withdrawn). Filters are resolved fresh on every run, so students who newly match are included automatically.
Each schedule in the table shows its cadence (e.g. “Every Monday at 08:00”), its template, its Next run, its Last result (how many reports were generated, emailed, or failed), and a status of Active or Paused. Use the row actions to pause, resume, or delete a schedule — deleting a schedule keeps the reports it already generated.
Scheduled reports do not require approval. Each run uses the latest matching students and academic data, then emails the reports automatically. Reports created by a schedule are tagged Scheduled in the History tab, so you can distinguish them from manually generated reports.
For official student reports, use the Email report action described in Emailing reports above — adult students receive their own copy, and a child’s report goes to their parents. Official reports with Student access also appear on the student’s Transcript page.Use Print to create a PDF copy for sharing outside DeanDesk. Students can review the official reports made available to them from My Transcript in their profile; they do not generate new official reports themselves.
View report totals, this month’s activity, pending drafts, official reports, and recent report activity; open the corresponding work queue.
Generate
Select students, report settings, and a template; generate reports and review the output.
History
Search existing reports, filter status or batch, preview reports, and use available export, official-status, or email actions.
Schedules
Configure recurring report generation and delivery, then review or maintain existing schedules.
Templates
Create and manage reusable report designs.
The template designer has four tabs: Content for report fields, labels, and footer; Letterhead for identity, logo, and header arrangement; Type & color for typography and colors; and Layout for paper settings, section order, and information layout. Inspect the live preview before saving a template.
Was this page helpful?
⌘I
{"docsConfig":{"theme":"almond","$schema":"https://mintlify.com/docs.json","name":"DeanDesk","colors":{"primary":"#7c7c7c","light":"#080808","dark":"#c1c1c1"},"logo":{"light":"https://mintcdn.com/deandesk/fdE4kIsjz9Yc7EsS/images/logo-light.svg?fit=max\u0026auto=format\u0026n=fdE4kIsjz9Yc7EsS\u0026q=85\u0026s=36694fe1a3c1a808d37352d463b6ea86","dark":"https://mintcdn.com/deandesk/fdE4kIsjz9Yc7EsS/images/logo-dark.svg?fit=max\u0026auto=format\u0026n=fdE4kIsjz9Yc7EsS\u0026q=85\u0026s=f4f44881ecac8d74a6400d22000b44b3"},"favicon":"https://mintcdn.com/deandesk/7hPKdyCX79jlDRgL/images/favicon.png?fit=max\u0026auto=format\u0026n=7hPKdyCX79jlDRgL\u0026q=85\u0026s=25ccd86c5c2e369deca23f92cdde87a1","navbar":{"primary":{"type":"button","label":"Get Started Free","href":"https://deandesk.com/get-started"}},"styling":{"latex":true},"navigation":{"pages":[]}},"deployment":{"deploymentMetadataValue":{"subdomain":"deandesk","hasAudioNarration":false,"actualSubdomain":"deandesk","customDomains":["docs.deandesk.com"],"gitSource":{"type":"github","owner":"uthmanq","repo":"docs","deployBranch":"main","isPrivate":true,"contentDirectory":"","mountPath":"","label":""},"chroma":{"liveDeploymentHistoryId":"6ad7f39d011c0457d0ac18e5","collectionId":"281ee397-a7d8-4727-9a3c-3b727dd0589f","schemaVersion":"v3","latestBuiltDeploymentHistoryId":"6ad7f39d011c0457d0ac18e5"},"feedback":{"thumbs":true},"entitlements":{},"buildId":"6ada59180387e457c218a510","clientVersion":"0.0.3933","searchFilterCounts":[{"language":"default","tag":"Documentation","count":104},{"language":"default","tag":"Setup","count":15},{"language":"default","tag":"Finance","count":14},{"language":"default","tag":"Institution Management","count":14},{"language":"default","tag":"Learning Management","count":14},{"language":"default","tag":"Teaching a course","count":12},{"language":"default","tag":"Student Management","count":9},{"language":"default","tag":"School onboarding","count":8},{"language":"default","tag":"Get Started","count":6},{"language":"default","tag":"Communication","count":4}]},"assistantConfig":{"enableAskAiButton":false,"enableStarterQuestions":false,"enableContextualStarterQuestions":false,"enableAskAiSearchBar":true},"hasChatPermissions":false,"hasWebMcpPermissions":false,"toggles":[{"name":"kill-isr","enabled":true,"variant":{"name":"disabled","enabled":false,"feature_enabled":true},"impressionData":false},{"name":"agent-mintlify-slack","enabled":true,"variant":{"name":"disabled","enabled":false,"feature_enabled":true},"impressionData":false},{"name":"editor-v7-file-tree","enabled":true,"variant":{"name":"disabled","enabled":false,"feature_enabled":true},"impressionData":false},{"name":"agent-integrations-settings","enabled":true,"variant":{"name":"disabled","enabled":false,"feature_enabled":true},"impressionData":false},{"name":"automations-pr-grouping","enabled":true,"variant":{"name":"disabled","enabled":false,"feature_enabled":true},"impressionData":false},{"name":"custom-prefix","enabled":true,"variant":{"name":"disabled","enabled":false,"feature_enabled":true},"impressionData":false},{"name":"analytics-v7","enabled":true,"variant":{"name":"disabled","enabled":false,"feature_enabled":true},"impressionData":false},{"name":"user-flows-analytics","enabled":true,"variant":{"name":"disabled","enabled":false,"feature_enabled":true},"impressionData":false},{"name":"no-publish-flow","enabled":true,"variant":{"name":"disabled","enabled":false,"feature_enabled":true},"impressionData":false},{"name":"workos-onboarding","enabled":true,"variant":{"name":"disabled","enabled":false,"feature_enabled":true},"impressionData":false},{"name":"llms-txt-v2","enabled":true,"variant":{"name":"disabled","enabled":false,"feature_enabled":true},"impressionData":false},{"name":"pause-universal-search-reconcile","enabled":true,"variant":{"name":"disabled","enabled":false,"feature_enabled":true},"impressionData":false},{"name":"snapshot-serving-live","enabled":true,"variant":{"name":"disabled","enabled":false,"feature_enabled":true},"impressionData":false},{"name":"stripTemperatureMiddleware","enabled":true,"variant":{"name":"disabled","enabled":false,"feature_enabled":true},"impressionData":false},{"name":"per-site-search-delta","enabled":true,"variant":{"name":"disabled","enabled":false,"feature_enabled":true},"impressionData":false},{"name":"support-platform-pylon-zendesk","enabled":true,"variant":{"name":"disabled","enabled":false,"feature_enabled":true},"impressionData":false},{"name":"snapshot-serving","enabled":true,"variant":{"name":"disabled","enabled":false,"feature_enabled":true},"impressionData":false},{"name":"instant-rollback","enabled":true,"variant":{"name":"disabled","enabled":false,"feature_enabled":true},"impressionData":false},{"name":"granular-notifications-server","enabled":true,"variant":{"name":"disabled","enabled":false,"feature_enabled":true},"impressionData":false},{"name":"granular-notifications","enabled":true,"variant":{"name":"disabled","enabled":false,"feature_enabled":true},"impressionData":false},{"name":"editor-private-page-search","enabled":true,"variant":{"name":"disabled","enabled":false,"feature_enabled":true},"impressionData":false},{"name":"automations-fable","enabled":true,"variant":{"name":"disabled","enabled":false,"feature_enabled":true},"impressionData":false},{"name":"fixed-ai-action-pricing","enabled":true,"variant":{"name":"disabled","enabled":false,"feature_enabled":true},"impressionData":false},{"name":"automation-resolve-merge-conflict","enabled":true,"variant":{"name":"disabled","enabled":false,"feature_enabled":true},"impressionData":false},{"name":"scoped-publishing","enabled":true,"variant":{"name":"disabled","enabled":false,"feature_enabled":true},"impressionData":false},{"name":"mintql","enabled":true,"variant":{"name":"disabled","enabled":false,"feature_enabled":true},"impressionData":false},{"name":"page-level-analytics","enabled":true,"variant":{"name":"disabled","enabled":false,"feature_enabled":true},"impressionData":false},{"name":"editor-version-history-v2","enabled":true,"variant":{"name":"disabled","enabled":false,"feature_enabled":true},"impressionData":false},{"name":"editor-nav-generations","enabled":true,"variant":{"name":"disabled","enabled":false,"feature_enabled":true},"impressionData":false},{"name":"billing-page-v2","enabled":true,"variant":{"name":"disabled","enabled":false,"feature_enabled":true},"impressionData":false},{"name":"vite-origin","enabled":true,"variant":{"name":"disabled","enabled":false,"feature_enabled":true},"impressionData":false},{"name":"workspace-projects","enabled":true,"variant":{"name":"disabled","enabled":false,"feature_enabled":true},"impressionData":false},{"name":"assistant-v5","enabled":true,"variant":{"name":"disabled","enabled":false,"feature_enabled":true},"impressionData":false},{"name":"byok-sep-25","enabled":true,"variant":{"name":"disabled","enabled":false,"feature_enabled":true},"impressionData":false},{"name":"fork-pr-previews","enabled":true,"variant":{"name":"disabled","enabled":false,"feature_enabled":true},"impressionData":false},{"name":"revalidation-jwt","enabled":true,"variant":{"name":"disabled","enabled":false,"feature_enabled":true},"impressionData":false},{"name":"editor-agent-model-picker","enabled":true,"variant":{"name":"disabled","enabled":false,"feature_enabled":true},"impressionData":false},{"name":"billing-updated-9-15","enabled":true,"variant":{"name":"disabled","enabled":false,"feature_enabled":true},"impressionData":false},{"name":"hobby-abuse-scan","enabled":true,"variant":{"name":"disabled","enabled":false,"feature_enabled":true},"impressionData":false},{"name":"dashboard-inbox","enabled":true,"variant":{"name":"disabled","enabled":false,"feature_enabled":true},"impressionData":false}],"isAtlas":false,"googleFontsInlined":true},"customCss":[],"page":{"pagePath":"reports/student-reports","slug":"/reports/student-reports","pageMetadata":{"title":"Student reports","description":"Generate attendance, grade, transcript, and enrollment reports for your students.","href":"/reports/student-reports"},"description":{"compiledSource":"\"use strict\";\nconst {jsx: _jsx} = arguments[0];\nconst {useMDXComponents: _provideComponents} = arguments[0];\nfunction _createMdxContent(props) {\n const _components = {\n p: \"p\",\n ..._provideComponents(),\n ...props.components\n };\n return _jsx(_components.p, {\n children: \"Generate attendance, grade, transcript, and enrollment reports for your students.\"\n });\n}\nfunction MDXContent(props = {}) {\n const {wrapper: MDXLayout} = {\n ..._provideComponents(),\n ...props.components\n };\n return MDXLayout ? _jsx(MDXLayout, {\n ...props,\n children: _jsx(_createMdxContent, {\n ...props\n })\n }) : _createMdxContent(props);\n}\nreturn {\n default: MDXContent\n};\n","frontmatter":{},"scope":{}},"pageType":"default","mdx":{"mdxSource":{"compiledSource":"\"use strict\";const{Fragment:_Fragment,jsx:_jsx,jsxs:_jsxs}=arguments[0];const{useMDXComponents:_provideComponents}=arguments[0];const tutorialCaptions=`WEBVTT\n\n1\n00:00:00.350 --> 00:00:03.750\nIn this video, you'll generate a student report, approve it, and print it.\n\n2\n00:00:04.050 --> 00:00:06.270\nIt takes about two minutes.\n\n3\n00:00:07.375 --> 00:00:09.695\nOpen Academics in the admin sidebar.\n\n4\n00:00:10.748 --> 00:00:12.528\nThen choose Reports.\n\n5\n00:00:13.712 --> 00:00:15.372\nReports are built from templates.\n\n6\n00:00:16.052 --> 00:00:20.552\nA template decides what's included, like grades and attendance, and how the page looks.\n\n7\n00:00:21.632 --> 00:00:24.912\nWe've already made one called Northstar Progress Report.\n\n8\n00:00:25.772 --> 00:00:27.472\nUse Create Template to make your own.\n\n9\n00:00:28.523 --> 00:00:29.943\nNow open Generate.\n\n10\n00:00:31.021 --> 00:00:33.641\nPick your template and click Next.\n\n11\n00:00:34.763 --> 00:00:35.563\nSet the scope.\n\n12\n00:00:36.163 --> 00:00:38.803\nAcademic year and Term limit which courses appear.\n\n13\n00:00:39.643 --> 00:00:42.643\nCourse, Roster, and Enrollment status narrow the students.\n\n14\n00:00:43.403 --> 00:00:45.383\nWe'll keep everything, and click Next.\n\n15\n00:00:46.485 --> 00:00:48.305\nEveryone starts selected.\n\n16\n00:00:48.945 --> 00:00:51.965\nClick Deselect all, then pick Jamie Rivera.\n\n17\n00:00:53.265 --> 00:00:56.345\nAdd a batch name, so you can find this run later.\n\n18\n00:00:57.433 --> 00:00:59.253\nChoose who can see it.\n\n19\n00:01:00.193 --> 00:01:03.513\nStudent access lets the student and family view it once it's official.\n\n20\n00:01:04.753 --> 00:01:06.093\nInternal is for admins only.\n\n21\n00:01:07.433 --> 00:01:08.533\nClick Generate.\n\n22\n00:01:09.053 --> 00:01:10.713\nNew reports start as drafts.\n\n23\n00:01:11.660 --> 00:01:15.660\nClick View generated reports to open them in History.\n\n24\n00:01:16.761 --> 00:01:19.021\nOpen the draft and check it carefully.\n\n25\n00:01:19.721 --> 00:01:21.601\nA report is a saved snapshot.\n\n26\n00:01:22.641 --> 00:01:24.481\nFix grades first, then generate.\n\n27\n00:01:25.694 --> 00:01:28.134\nWhen it looks right, click Approve.\n\n28\n00:01:28.654 --> 00:01:29.414\nIt's now official.\n\n29\n00:01:30.557 --> 00:01:35.497\nPrint opens the report in a new window, where you can print it or save a PDF.\n\n30\n00:01:36.760 --> 00:01:39.780\nOfficial reports can be sent to families with Email report.\n\n31\n00:01:40.300 --> 00:01:41.720\nWe won't send email in this demo.\n\n32\n00:01:42.817 --> 00:01:43.477\nThat's it.\n\n33\n00:01:43.917 --> 00:01:46.017\nYou've generated and approved a report.\n\n34\n00:01:47.017 --> 00:01:48.637\nNext, see the Gradebook guide.\n`;const TutorialVideo=({src,poster,captions,title})=>{const _components={a:`a`,..._provideComponents()};const tutorialVideoSources={\"/videos/tutorials/communication-announcements.mp4\":`https://deandesk-static-img.s3.us-east-1.amazonaws.com/docs/tutorials/communication-announcements.d61d0f3aaca06b46208c74b58c34abefd6c4d48c1e3cdd110ce8cef4d97e2059.mp4`,\"/videos/tutorials/communication-discussions.mp4\":`https://deandesk-static-img.s3.us-east-1.amazonaws.com/docs/tutorials/communication-discussions.4265e479beb59bee1f4961fcfe0fda65d9a1ad7bbb34a14f4ce6a7f10ac45547.mp4`,\"/videos/tutorials/communication-emails.mp4\":`https://deandesk-static-img.s3.us-east-1.amazonaws.com/docs/tutorials/communication-emails.66b457bb909678fbe2448e4b67a204218e2c26034773e4c79775de0b3a3e1ab5.mp4`,\"/videos/tutorials/communication-system-emails.mp4\":`https://deandesk-static-img.s3.us-east-1.amazonaws.com/docs/tutorials/communication-system-emails.3521ae73efaf61bb43c243994e2aee1fca807217a479a33f1f579799b7a7ac52.mp4`,\"/videos/tutorials/finance-bookings.mp4\":`https://deandesk-static-img.s3.us-east-1.amazonaws.com/docs/tutorials/finance-bookings.7705236096cdde510d5119e455aade38f340f4097e14836f63e9758005d16920.mp4`,\"/videos/tutorials/finance-discounts.mp4\":`https://deandesk-static-img.s3.us-east-1.amazonaws.com/docs/tutorials/finance-discounts.fe0f1461aa590192cf536326d7d71e8672f3db34ef66e8803d20de15b82796da.mp4`,\"/videos/tutorials/finance-enrollments.mp4\":`https://deandesk-static-img.s3.us-east-1.amazonaws.com/docs/tutorials/finance-enrollments.aeb02026b9167375fd90259c27891d0b5febcc081b87e1c8218415d5d679dc58.mp4`,\"/videos/tutorials/finance-financial-aid.mp4\":`https://deandesk-static-img.s3.us-east-1.amazonaws.com/docs/tutorials/finance-financial-aid.a7032fc9397476bc5de566eab3189512f69f77783b11a1e6da490926ea1988e2.mp4`,\"/videos/tutorials/finance-invoicing.mp4\":`https://deandesk-static-img.s3.us-east-1.amazonaws.com/docs/tutorials/finance-invoicing.64663d238222b75f23745ea3cc86f205c16a6d4c6f5ff7efc4de0f7e931d1b06.mp4`,\"/videos/tutorials/finance-orders.mp4\":`https://deandesk-static-img.s3.us-east-1.amazonaws.com/docs/tutorials/finance-orders.de6ecd4338396ef1971213ee7b0eae11dbd32fc3c2328275888a1e058669dc50.mp4`,\"/videos/tutorials/finance-payroll.mp4\":`https://deandesk-static-img.s3.us-east-1.amazonaws.com/docs/tutorials/finance-payroll.4c6e0cfed614954988cd644288874f97f6c76f6ffd2494aca95d0819d83b6b14.mp4`,\"/videos/tutorials/finance-products.mp4\":`https://deandesk-static-img.s3.us-east-1.amazonaws.com/docs/tutorials/finance-products.b29af3bf767dc239fd9b9cb17d129887f348e9b890af9f5a79e90bacdce0e7ee.mp4`,\"/videos/tutorials/finance-programs.mp4\":`https://deandesk-static-img.s3.us-east-1.amazonaws.com/docs/tutorials/finance-programs.1db3c13a84c8b33289b79a0e1f8b10a31702808e41304dbdd2f9115a31c91b64.mp4`,\"/videos/tutorials/finance-review-simulator.mp4\":`https://deandesk-static-img.s3.us-east-1.amazonaws.com/docs/tutorials/finance-review-simulator.6bc28008dd5ae393e583119032f00a9075642edf2b236a8915009e3ae49ad220.mp4`,\"/videos/tutorials/finance-stripe.mp4\":`https://deandesk-static-img.s3.us-east-1.amazonaws.com/docs/tutorials/finance-stripe.7d2ab077b67b9634828085dc8776d92057732e0e0f8f18eae46626a46cb9ca3b.mp4`,\"/videos/tutorials/finance-subscriptions.mp4\":`https://deandesk-static-img.s3.us-east-1.amazonaws.com/docs/tutorials/finance-subscriptions.d69ab4e2c401f046307c38ada438ee073fc39c6fb8d44cb3c76a6c8a52de7edb.mp4`,\"/videos/tutorials/finance-transactions.mp4\":`https://deandesk-static-img.s3.us-east-1.amazonaws.com/docs/tutorials/finance-transactions.4b36fac8fc8f819222ca6f51264bb59b623fdb982bf68e0fdf081504b30bdecd.mp4`,\"/videos/tutorials/getting-started-first-login.mp4\":`https://deandesk-static-img.s3.us-east-1.amazonaws.com/docs/tutorials/getting-started-first-login.4bf6eb08484b710d515ff5109364ab6fdc6d9484cfff49bc522494a124f3662f.mp4`,\"/videos/tutorials/getting-started-institutions-and-schools.mp4\":`https://deandesk-static-img.s3.us-east-1.amazonaws.com/docs/tutorials/getting-started-institutions-and-schools.3cbc093a108c9e413310b17dbe4ff458ddfebd09696e152e746800d1f59d9fe1.mp4`,\"/videos/tutorials/getting-started-member-account.mp4\":`https://deandesk-static-img.s3.us-east-1.amazonaws.com/docs/tutorials/getting-started-member-account.0bc088c834d0d9167ce51bd7acefd86178d383ae3aa21ee69ce061486ab52f75.mp4`,\"/videos/tutorials/institution-ai-chat.mp4\":`https://deandesk-static-img.s3.us-east-1.amazonaws.com/docs/tutorials/institution-ai-chat.3ecdad2e67a0acdae16b966d0e3e0f5a98d3ed2e4e5b2b448e36771fe5c4eb3a.mp4`,\"/videos/tutorials/institution-billing.mp4\":`https://deandesk-static-img.s3.us-east-1.amazonaws.com/docs/tutorials/institution-billing.201ee3ee09144b2e7b80c40b4190e398272dceb1d84239923635bcad394bb9c5.mp4`,\"/videos/tutorials/institution-cases.mp4\":`https://deandesk-static-img.s3.us-east-1.amazonaws.com/docs/tutorials/institution-cases.fdab373c1af668fee753ead76325b330e4df5bf9104cc344a389dc672a98bd9d.mp4`,\"/videos/tutorials/institution-dashboard.mp4\":`https://deandesk-static-img.s3.us-east-1.amazonaws.com/docs/tutorials/institution-dashboard.87307184cf6778a379293f1b5357c801b490a060f7ddf852521b2fe193b38464.mp4`,\"/videos/tutorials/institution-finance.mp4\":`https://deandesk-static-img.s3.us-east-1.amazonaws.com/docs/tutorials/institution-finance.95437f6c70956bc1936da4c62a40840e7073a464e869b63e03813d4d23f6403e.mp4`,\"/videos/tutorials/institution-identities.mp4\":`https://deandesk-static-img.s3.us-east-1.amazonaws.com/docs/tutorials/institution-identities.a72756bcf9d7805bf414aa8b6dee36793ffd8bafe336c8b7401af5fd8010acd3.mp4`,\"/videos/tutorials/institution-integrations.mp4\":`https://deandesk-static-img.s3.us-east-1.amazonaws.com/docs/tutorials/institution-integrations.3a89663eb72084750398f385e55d36accdd7ebddb25103fac277a2ce67d0a5a6.mp4`,\"/videos/tutorials/institution-memberships.mp4\":`https://deandesk-static-img.s3.us-east-1.amazonaws.com/docs/tutorials/institution-memberships.74c5080634480a5bb47d2a218ff3c6b3c5a6088d2617722384aa05f112e9b69a.mp4`,\"/videos/tutorials/institution-metadata.mp4\":`https://deandesk-static-img.s3.us-east-1.amazonaws.com/docs/tutorials/institution-metadata.c8a6351fc239cdb417de155a8ecd1891cacec43016e71bda5dc7d98a4db4551c.mp4`,\"/videos/tutorials/institution-platforms.mp4\":`https://deandesk-static-img.s3.us-east-1.amazonaws.com/docs/tutorials/institution-platforms.f0e3081c01b5209498f2bdaf6f26d85cd7a7ec477dba6a18e697aa85b7d2e1b0.mp4`,\"/videos/tutorials/institution-projects.mp4\":`https://deandesk-static-img.s3.us-east-1.amazonaws.com/docs/tutorials/institution-projects.9ffb6d4a23521a263b3a910701873b28b9c17df066151c018da1d73989290a5f.mp4`,\"/videos/tutorials/institution-settings.mp4\":`https://deandesk-static-img.s3.us-east-1.amazonaws.com/docs/tutorials/institution-settings.7dade15c52f9dffa4140e40389f24493a465dd390c05105266707dd25226da08.mp4`,\"/videos/tutorials/institution-shared-drive.mp4\":`https://deandesk-static-img.s3.us-east-1.amazonaws.com/docs/tutorials/institution-shared-drive.13fb8e60028e9a8b60391770c412e154d87ba828fab66f40aa3383c95c7705b8.mp4`,\"/videos/tutorials/institution-stripe.mp4\":`https://deandesk-static-img.s3.us-east-1.amazonaws.com/docs/tutorials/institution-stripe.5120978d70c9c57c3331eebcf6aae8c48cc969d65247c743894ebe8375c8afd8.mp4`,\"/videos/tutorials/integrations-edfi.mp4\":`https://deandesk-static-img.s3.us-east-1.amazonaws.com/docs/tutorials/integrations-edfi.e5e746de9ec2d38ad1c58b09f7eb2ceef393640cf16455721d197b7d9012dc4c.mp4`,\"/videos/tutorials/integrations-zoom-google-calendar.mp4\":`https://deandesk-static-img.s3.us-east-1.amazonaws.com/docs/tutorials/integrations-zoom-google-calendar.f1efc38fc01b29b925837f29f72b2d97ecbfd372c629714e1758a64986cd962b.mp4`,\"/videos/tutorials/introduction.mp4\":`https://deandesk-static-img.s3.us-east-1.amazonaws.com/docs/tutorials/introduction.e7ea81bfc1299fe677a64c779a854c620544167b4e60964e9536525090d6222a.mp4`,\"/videos/tutorials/lms-assignments.mp4\":`https://deandesk-static-img.s3.us-east-1.amazonaws.com/docs/tutorials/lms-assignments.cdcd86e44be5e7f935a166d08d7f3dbea8660d9cf8c994d0a5d881e9cb10d84c.mp4`,\"/videos/tutorials/lms-attendance.mp4\":`https://deandesk-static-img.s3.us-east-1.amazonaws.com/docs/tutorials/lms-attendance.d47f1a8878bcd2666fde728c70b5d96d952156348924614886ae6d0f1b372175.mp4`,\"/videos/tutorials/lms-bulk-enrollment.mp4\":`https://deandesk-static-img.s3.us-east-1.amazonaws.com/docs/tutorials/lms-bulk-enrollment.4f3fecef2abcd3caec39799e1f04bfcf3820dd839fb1b74ca71371ac389c240e.mp4`,\"/videos/tutorials/lms-course-groups.mp4\":`https://deandesk-static-img.s3.us-east-1.amazonaws.com/docs/tutorials/lms-course-groups.cd4757d20152c97b59460cdff9071e0c38e04399872aff50684c2be81e016878.mp4`,\"/videos/tutorials/lms-courses.mp4\":`https://deandesk-static-img.s3.us-east-1.amazonaws.com/docs/tutorials/lms-courses.2625072aad429340f6c852294ab8b8383ef2d6d941fda0b1bc11f8c797d75a84.mp4`,\"/videos/tutorials/lms-curriculum-maps.mp4\":`https://deandesk-static-img.s3.us-east-1.amazonaws.com/docs/tutorials/lms-curriculum-maps.dd7618e3c3eca7229a44b0708d8361ac98a157552b6bf1b37edda024d15fbabc.mp4`,\"/videos/tutorials/lms-gradebook.mp4\":`https://deandesk-static-img.s3.us-east-1.amazonaws.com/docs/tutorials/lms-gradebook.544a98a7050f823fcf69fb98a118e83e4a80426332cce97c5b82a58f90e6f991.mp4`,\"/videos/tutorials/lms-grading-standards.mp4\":`https://deandesk-static-img.s3.us-east-1.amazonaws.com/docs/tutorials/lms-grading-standards.3718f8fa6989d91e12a925ec0970e87e48b048e7d7c309a6c304073648129d7b.mp4`,\"/videos/tutorials/lms-live-classes.mp4\":`https://deandesk-static-img.s3.us-east-1.amazonaws.com/docs/tutorials/lms-live-classes.69bf4279fb8142e8b716c4d7a8fc0941710ee2f8b562865e6c78531ee1639588.mp4`,\"/videos/tutorials/lms-pages.mp4\":`https://deandesk-static-img.s3.us-east-1.amazonaws.com/docs/tutorials/lms-pages.06f155d5269da81708c790e9de8905f6adbaa733fe7603c8bdc7164e2a522e9d.mp4`,\"/videos/tutorials/lms-programs-and-events.mp4\":`https://deandesk-static-img.s3.us-east-1.amazonaws.com/docs/tutorials/lms-programs-and-events.e643aaf472e92f6cb8d2f121c6854a7accf08174e6e909849bada6d3db54f66a.mp4`,\"/videos/tutorials/lms-surveys.mp4\":`https://deandesk-static-img.s3.us-east-1.amazonaws.com/docs/tutorials/lms-surveys.cda5e35ca06c08be5f4db2b96708b167b6856df970c02c043b67430392450560.mp4`,\"/videos/tutorials/lms-waitlists.mp4\":`https://deandesk-static-img.s3.us-east-1.amazonaws.com/docs/tutorials/lms-waitlists.939bf49e062d7dee2f4e9298b6ccf1414fd8bc2fbf6c32946d4dc35a8a68a8e0.mp4`,\"/videos/tutorials/mobile-overview.mp4\":`https://deandesk-static-img.s3.us-east-1.amazonaws.com/docs/tutorials/mobile-overview.6ab058e957e745d8cc25f73a7829b3cb26c366248925d5fa081555947eaa2851.mp4`,\"/videos/tutorials/mobile-push-notifications.mp4\":`https://deandesk-static-img.s3.us-east-1.amazonaws.com/docs/tutorials/mobile-push-notifications.ef7d361233ad52f20b75796d5e4af63bdc0968a8d2e81443728cbc1596e86872.mp4`,\"/videos/tutorials/quickstart.mp4\":`https://deandesk-static-img.s3.us-east-1.amazonaws.com/docs/tutorials/quickstart.83867da9d56a5bfa522b1ac660891ea3489086c851f1462916c69a88f3562b5b.mp4`,\"/videos/tutorials/reports-financial-reports.mp4\":`https://deandesk-static-img.s3.us-east-1.amazonaws.com/docs/tutorials/reports-financial-reports.3a4aec5296b7dcd5d5c1b52e82e802a49a9dfc845701b16e5acebc6a4ad96171.mp4`,\"/videos/tutorials/reports-student-reports.mp4\":`https://deandesk-static-img.s3.us-east-1.amazonaws.com/docs/tutorials/reports-student-reports.66c297c7207c78072ffac0e200a665bc1bb77990a3b49d2a5beae360a72e404a.mp4`,\"/videos/tutorials/school-setup-index.mp4\":`https://deandesk-static-img.s3.us-east-1.amazonaws.com/docs/tutorials/school-setup-index.9ec195ef71468d1b4111b94327c807be2809dcb83bbab6f49218a7ecf23978c3.mp4`,\"/videos/tutorials/setup-admin-ai.mp4\":`https://deandesk-static-img.s3.us-east-1.amazonaws.com/docs/tutorials/setup-admin-ai.445dea379159898c5e8f655396ec32036859532397e90e9d825939899f49a64e.mp4`,\"/videos/tutorials/setup-admin-dashboard.mp4\":`https://deandesk-static-img.s3.us-east-1.amazonaws.com/docs/tutorials/setup-admin-dashboard.44d727b88c08744447c17aee22e5fe0c4acb37bc2dcaf56d8aee1ad137dd2ebb.mp4`,\"/videos/tutorials/setup-branding.mp4\":`https://deandesk-static-img.s3.us-east-1.amazonaws.com/docs/tutorials/setup-branding.c4a554fd99e61fff0de991e237a3b2abba47525abceaf9501585b9855bb9b5c3.mp4`,\"/videos/tutorials/setup-calendar.mp4\":`https://deandesk-static-img.s3.us-east-1.amazonaws.com/docs/tutorials/setup-calendar.8fdb564160abd2c218280957cf451161118960be0c65eb30e75b8cc3e13c1cfe.mp4`,\"/videos/tutorials/setup-courses.mp4\":`https://deandesk-static-img.s3.us-east-1.amazonaws.com/docs/tutorials/setup-courses.80a0fb26a225cceef9f54de289de5720c82219836d8e133d550cb774cd237fa3.mp4`,\"/videos/tutorials/setup-documents.mp4\":`https://deandesk-static-img.s3.us-east-1.amazonaws.com/docs/tutorials/setup-documents.93fe7de38dc6ab7fa79bbc5ca1e53e0de481d40028bab1fac949f25372e76650.mp4`,\"/videos/tutorials/setup-files.mp4\":`https://deandesk-static-img.s3.us-east-1.amazonaws.com/docs/tutorials/setup-files.92c1863756bcdfb01ed84727b238d2dea3cbade69a4e2e61c2e77cfc2539f1a0.mp4`,\"/videos/tutorials/setup-forms.mp4\":`https://deandesk-static-img.s3.us-east-1.amazonaws.com/docs/tutorials/setup-forms.29b27a36108e1def085b71d730e3104971aa0512c39d0d59fc21b592673d0f92.mp4`,\"/videos/tutorials/setup-payments.mp4\":`https://deandesk-static-img.s3.us-east-1.amazonaws.com/docs/tutorials/setup-payments.19b7f4da71ab5e757dc219d1834f8bc8ac3d350f50e5a874e53535d1afe7eebb.mp4`,\"/videos/tutorials/setup-profile-forms.mp4\":`https://deandesk-static-img.s3.us-east-1.amazonaws.com/docs/tutorials/setup-profile-forms.9605222ab15be4ad034927c4ed71c3258210ba181004b11fcd8af1a6f698b98a.mp4`,\"/videos/tutorials/setup-scheduling.mp4\":`https://deandesk-static-img.s3.us-east-1.amazonaws.com/docs/tutorials/setup-scheduling.7aa52ef49c66b62c0fa496364faad5c8324817ebaca956487be5208dbf513b2f.mp4`,\"/videos/tutorials/setup-school-settings.mp4\":`https://deandesk-static-img.s3.us-east-1.amazonaws.com/docs/tutorials/setup-school-settings.4630268d1ae7037a4db0301fb3b44c6c68ee3c3c1f45dd144d574086e6cf9d81.mp4`,\"/videos/tutorials/setup-support.mp4\":`https://deandesk-static-img.s3.us-east-1.amazonaws.com/docs/tutorials/setup-support.7aa86b7535b728696a5d6b70b25802e387c44f9535c496b149ecb5d147ec103b.mp4`,\"/videos/tutorials/setup-users.mp4\":`https://deandesk-static-img.s3.us-east-1.amazonaws.com/docs/tutorials/setup-users.1e5f754622a2a70cfd9dc925bd7e236f9ed0000edf90f8a78982be02a7c9ff58.mp4`,\"/videos/tutorials/setup-website.mp4\":`https://deandesk-static-img.s3.us-east-1.amazonaws.com/docs/tutorials/setup-website.9cac0883b993f455c42c754341da3db441b2a82cd4d4bb8f7e4dba1b5f5d8ba3.mp4`,\"/videos/tutorials/sis-admissions.mp4\":`https://deandesk-static-img.s3.us-east-1.amazonaws.com/docs/tutorials/sis-admissions.610a5bc91a55ab9cb76f445e9417ecdf285e50fca69b4197cd80fba69697bace.mp4`,\"/videos/tutorials/sis-billing.mp4\":`https://deandesk-static-img.s3.us-east-1.amazonaws.com/docs/tutorials/sis-billing.236bbd626e9acfcfae9bffd7cb95c4c89fbaceeac13d7213cb1213c18935a15e.mp4`,\"/videos/tutorials/sis-delete-user.mp4\":`https://deandesk-static-img.s3.us-east-1.amazonaws.com/docs/tutorials/sis-delete-user.80ff44703e0b6dab407b1078fbf146822250759ef1d2a554d1df3c98c16e5c28.mp4`,\"/videos/tutorials/sis-disciplinary-records.mp4\":`https://deandesk-static-img.s3.us-east-1.amazonaws.com/docs/tutorials/sis-disciplinary-records.e78deb5905754cfbf1bea3e76b64455657101a67cd0914896ed6139bf25d2723.mp4`,\"/videos/tutorials/sis-institution-memberships.mp4\":`https://deandesk-static-img.s3.us-east-1.amazonaws.com/docs/tutorials/sis-institution-memberships.c9963739a5b7b191cf95a2a118fa574915235cda66d21acac29d016a99e56799.mp4`,\"/videos/tutorials/sis-offboarding.mp4\":`https://deandesk-static-img.s3.us-east-1.amazonaws.com/docs/tutorials/sis-offboarding.485cd42fec23236ac033690e1b03a311803ed3739695d4d7a9f98172019cb759.mp4`,\"/videos/tutorials/sis-rosters.mp4\":`https://deandesk-static-img.s3.us-east-1.amazonaws.com/docs/tutorials/sis-rosters.76d53f90654b092fb0a7614f59b9defb02129009b9d67a7e49bae88f9fca1eec.mp4`,\"/videos/tutorials/sis-student-records.mp4\":`https://deandesk-static-img.s3.us-east-1.amazonaws.com/docs/tutorials/sis-student-records.0b14caf50fb157b6feac8fb8039f56116ed3c82686bc0ca8ef233807dff28930.mp4`,\"/videos/tutorials/sis-volunteers.mp4\":`https://deandesk-static-img.s3.us-east-1.amazonaws.com/docs/tutorials/sis-volunteers.5d09ff1a9c7e48f1fc5443f52e19ede54a7050ce5da59ab5d3ee6c183f200461.mp4`,\"/videos/tutorials/teaching-announcements.mp4\":`https://deandesk-static-img.s3.us-east-1.amazonaws.com/docs/tutorials/teaching-announcements.e54cab96ce83d445785e9b5fd11fffcd63146d6e04fb4f81087c49d4cecb26d5.mp4`,\"/videos/tutorials/teaching-assignments.mp4\":`https://deandesk-static-img.s3.us-east-1.amazonaws.com/docs/tutorials/teaching-assignments.608e3f31230d4697ddf9fb0583bf38ff69e353302abd15d66ecb6d90f4cd74fb.mp4`,\"/videos/tutorials/teaching-attendance.mp4\":`https://deandesk-static-img.s3.us-east-1.amazonaws.com/docs/tutorials/teaching-attendance.474ebc2ad8d3ee811734e1c10c32737ccba26deee56f76b5c8e697e8283fbda2.mp4`,\"/videos/tutorials/teaching-chat.mp4\":`https://deandesk-static-img.s3.us-east-1.amazonaws.com/docs/tutorials/teaching-chat.5da291eb2789f02c0137793b19827642e3a0da999e659b362df744921fa44a87.mp4`,\"/videos/tutorials/teaching-course-tour.mp4\":`https://deandesk-static-img.s3.us-east-1.amazonaws.com/docs/tutorials/teaching-course-tour.a81774160c8d4f396fd12c5880eced420436010b34f7c56015652d567b0662a9.mp4`,\"/videos/tutorials/teaching-curriculum.mp4\":`https://deandesk-static-img.s3.us-east-1.amazonaws.com/docs/tutorials/teaching-curriculum.389b47bdde4949b813aec6ae4d7d84729c7e9ba380970eb5b1c46573d22b1e17.mp4`,\"/videos/tutorials/teaching-discussions.mp4\":`https://deandesk-static-img.s3.us-east-1.amazonaws.com/docs/tutorials/teaching-discussions.b7a94892f207664f9005b4984d05179d0b8e8f8c0a63302a8c9f91e0e21e98a8.mp4`,\"/videos/tutorials/teaching-gradebook.mp4\":`https://deandesk-static-img.s3.us-east-1.amazonaws.com/docs/tutorials/teaching-gradebook.151560959e3ada107a1c763524432eb7aba36d9775f3ac1c7b530e3eacdd6f36.mp4`,\"/videos/tutorials/teaching-materials.mp4\":`https://deandesk-static-img.s3.us-east-1.amazonaws.com/docs/tutorials/teaching-materials.067c839503bab716f343df2f790a8ef9a1168877647a4af615b71c6d9d867ce9.mp4`,\"/videos/tutorials/teaching-overview.mp4\":`https://deandesk-static-img.s3.us-east-1.amazonaws.com/docs/tutorials/teaching-overview.f8bf741d5ce22b650111d9e49db4931dee417d33f7ae5315f736f3ea36ff1a3f.mp4`,\"/videos/tutorials/teaching-students.mp4\":`https://deandesk-static-img.s3.us-east-1.amazonaws.com/docs/tutorials/teaching-students.a4895c5dc68271dd5d9694578974134ca4bc398ce47e7824d5fc866e0615b8d4.mp4`,\"/videos/tutorials/teaching-surveys.mp4\":`https://deandesk-static-img.s3.us-east-1.amazonaws.com/docs/tutorials/teaching-surveys.d57d6fc33789f1cf46f22df4c52b6dd588b14d7c203a1390690f18547133e935.mp4`};const captionUrl=`data:text/vtt;charset=utf-8,`+encodeURIComponent(captions);const playbackSrc=tutorialVideoSources[src]||src;return _jsxs(`div`,{children:[_jsxs(`video`,{controls:true,playsInline:true,preload:`metadata`,poster,width:`100%`,\"aria-label\":title,children:[_jsx(`source`,{src:playbackSrc,type:`video/mp4`}),_jsx(`track`,{kind:`captions`,src:captionUrl,srcLang:`en`,label:`English`,default:true}),`Your browser does not support embedded video. `,_jsx(_components.a,{href:playbackSrc,children:`Open the video`}),`.`]}),_jsxs(`p`,{children:[_jsx(_components.a,{href:src,download:true,children:`Download the video`}),` · `,_jsx(_components.a,{href:captionUrl,download:`english-captions.vtt`,children:`Download English captions`})]})]})};function _createMdxContent(props){const _components={a:`a`,code:`code`,li:`li`,p:`p`,strong:`strong`,tbody:`tbody`,td:`td`,th:`th`,thead:`thead`,tr:`tr`,ul:`ul`,..._provideComponents(),...props.components},{Frame,Heading,Info,Note,OptimizedImage,Step,Steps,Table,Tip,Warning,_MdxComponentBoundary}=_components;if(!Frame)_missingMdxReference(`Frame`,true);if(!Heading)_missingMdxReference(`Heading`,true);if(!Info)_missingMdxReference(`Info`,true);if(!Note)_missingMdxReference(`Note`,true);if(!OptimizedImage)_missingMdxReference(`OptimizedImage`,true);if(!Step)_missingMdxReference(`Step`,true);if(!Steps)_missingMdxReference(`Steps`,true);if(!Table)_missingMdxReference(`Table`,true);if(!Tip)_missingMdxReference(`Tip`,true);if(!Warning)_missingMdxReference(`Warning`,true);if(!_MdxComponentBoundary)_missingMdxReference(`_MdxComponentBoundary`,true);return _jsxs(_Fragment,{children:[_jsx(Info,{children:_jsxs(_components.p,{children:[_jsx(_components.strong,{children:`School-level feature`}),` — managed within your school portal at `,_jsx(_components.code,{children:`yourschool.deandesk.com`}),`.`]})}),`\n`,_jsx(Heading,{level:`2`,id:`video-walkthrough`,children:`Video walkthrough`}),`\n`,_jsx(_MdxComponentBoundary,{name:`TutorialVideo`,children:_jsx(TutorialVideo,{src:`/videos/tutorials/reports-student-reports.mp4`,poster:`/images/tutorials/reports-student-reports.jpg`,captions:tutorialCaptions,title:`Student reports walkthrough`})}),`\n`,_jsx(Note,{children:`This walkthrough uses the real DeanDesk interface with the fictional Northstar Academy demo school and a calm, AI-generated English voice. Payments and outside services are not connected in the demo.`}),`\n`,_jsx(_components.p,{children:`Screenshots use fictional Northstar demo data.`}),`\n`,_jsxs(_components.p,{children:[`Student reports combine academic information into a saved document for an individual student. Open `,_jsx(_components.strong,{children:`Admin Dashboard → Academics → Reports`}),` to work with `,_jsx(_components.strong,{children:`Dashboard`}),`, `,_jsx(_components.strong,{children:`Generate`}),`, `,_jsx(_components.strong,{children:`History`}),`, `,_jsx(_components.strong,{children:`Schedules`}),`, and `,_jsx(_components.strong,{children:`Templates`}),`.`]}),`\n`,_jsx(_components.p,{children:`A template selects the content, including courses, grades, GPA, attendance, assignments, instructors, enrollment information, comments, and optionally disciplinary records. Choose the fields needed for a transcript, progress report, or internal review instead of selecting a separate report category.`}),`\n`,_jsx(Frame,{caption:`Northstar demo — Reports — Dashboard`,children:_jsx(OptimizedImage,{src:`https://mintcdn.com/deandesk/Ib88bqpYdQ7_QHTP/images/dashboard/school/reports--dashboard.jpg?fit=max\u0026auto=format\u0026n=Ib88bqpYdQ7_QHTP\u0026q=85\u0026s=064314308ae0db34d50771993f18504f`,alt:`Northstar demo: Reports — Dashboard`,loading:`lazy`,\"data-og-width\":`1440`,width:`1440`,\"data-og-height\":`1000`,height:`1000`,\"data-path\":`images/dashboard/school/reports--dashboard.jpg`,\"data-optimize\":`true`,\"data-opv\":`3`,srcset:`https://mintcdn.com/deandesk/Ib88bqpYdQ7_QHTP/images/dashboard/school/reports--dashboard.jpg?w=280\u0026fit=max\u0026auto=format\u0026n=Ib88bqpYdQ7_QHTP\u0026q=85\u0026s=b36db81c8dd7f8abe7f622a4fa287535 280w, https://mintcdn.com/deandesk/Ib88bqpYdQ7_QHTP/images/dashboard/school/reports--dashboard.jpg?w=560\u0026fit=max\u0026auto=format\u0026n=Ib88bqpYdQ7_QHTP\u0026q=85\u0026s=970c2ce5a6593d4c5f51864745a5248d 560w, https://mintcdn.com/deandesk/Ib88bqpYdQ7_QHTP/images/dashboard/school/reports--dashboard.jpg?w=840\u0026fit=max\u0026auto=format\u0026n=Ib88bqpYdQ7_QHTP\u0026q=85\u0026s=f53a6d7ecd5707977f4246d5b213623a 840w, https://mintcdn.com/deandesk/Ib88bqpYdQ7_QHTP/images/dashboard/school/reports--dashboard.jpg?w=1100\u0026fit=max\u0026auto=format\u0026n=Ib88bqpYdQ7_QHTP\u0026q=85\u0026s=460148e4e0186e98e9b5f784c18792cb 1100w, https://mintcdn.com/deandesk/Ib88bqpYdQ7_QHTP/images/dashboard/school/reports--dashboard.jpg?w=1650\u0026fit=max\u0026auto=format\u0026n=Ib88bqpYdQ7_QHTP\u0026q=85\u0026s=46074be771c66d51ea4bcd377ea91938 1650w, https://mintcdn.com/deandesk/Ib88bqpYdQ7_QHTP/images/dashboard/school/reports--dashboard.jpg?w=2500\u0026fit=max\u0026auto=format\u0026n=Ib88bqpYdQ7_QHTP\u0026q=85\u0026s=9e0de2e3c0254010931b0c1e900fe154 2500w`})}),`\n`,_jsx(_components.p,{children:_jsx(_components.a,{href:`/images/dashboard/school/reports--dashboard.jpg`,children:`Open full-size screenshot`})}),`\n`,_jsx(Heading,{level:`2`,id:`generate-and-export-a-report`,children:`Generate and export a report`}),`\n`,_jsxs(Steps,{children:[_jsxs(Step,{title:`Choose a template`,children:[_jsxs(_components.p,{children:[`Open `,_jsx(_components.strong,{children:`Generate`}),` and select a saved report template. If none exists, create one in `,_jsx(_components.strong,{children:`Templates`}),` first. Review the included fields.`]}),_jsx(Frame,{caption:`Northstar demo — Reports — Generate`,children:_jsx(OptimizedImage,{src:`https://mintcdn.com/deandesk/Ib88bqpYdQ7_QHTP/images/dashboard/school/reports--generate.jpg?fit=max\u0026auto=format\u0026n=Ib88bqpYdQ7_QHTP\u0026q=85\u0026s=20f5ad2352f8b98a32c5791069bb5eaa`,alt:`Northstar demo: Reports — Generate`,loading:`lazy`,\"data-og-width\":`1440`,width:`1440`,\"data-og-height\":`1000`,height:`1000`,\"data-path\":`images/dashboard/school/reports--generate.jpg`,\"data-optimize\":`true`,\"data-opv\":`3`,srcset:`https://mintcdn.com/deandesk/Ib88bqpYdQ7_QHTP/images/dashboard/school/reports--generate.jpg?w=280\u0026fit=max\u0026auto=format\u0026n=Ib88bqpYdQ7_QHTP\u0026q=85\u0026s=af5e6b43e898d1ceee6ffc214464c64a 280w, https://mintcdn.com/deandesk/Ib88bqpYdQ7_QHTP/images/dashboard/school/reports--generate.jpg?w=560\u0026fit=max\u0026auto=format\u0026n=Ib88bqpYdQ7_QHTP\u0026q=85\u0026s=412d4d4dc6e2b55e1e539cfc34631fbf 560w, https://mintcdn.com/deandesk/Ib88bqpYdQ7_QHTP/images/dashboard/school/reports--generate.jpg?w=840\u0026fit=max\u0026auto=format\u0026n=Ib88bqpYdQ7_QHTP\u0026q=85\u0026s=8bf203fd7c0fa377f9a4845bd396fd64 840w, https://mintcdn.com/deandesk/Ib88bqpYdQ7_QHTP/images/dashboard/school/reports--generate.jpg?w=1100\u0026fit=max\u0026auto=format\u0026n=Ib88bqpYdQ7_QHTP\u0026q=85\u0026s=5ac478e120686cdb67f5e5443f7ec7e3 1100w, https://mintcdn.com/deandesk/Ib88bqpYdQ7_QHTP/images/dashboard/school/reports--generate.jpg?w=1650\u0026fit=max\u0026auto=format\u0026n=Ib88bqpYdQ7_QHTP\u0026q=85\u0026s=d37c3e06603def336c225ebdff8363fe 1650w, https://mintcdn.com/deandesk/Ib88bqpYdQ7_QHTP/images/dashboard/school/reports--generate.jpg?w=2500\u0026fit=max\u0026auto=format\u0026n=Ib88bqpYdQ7_QHTP\u0026q=85\u0026s=4c66351025f28b67f6e27d67ae50925c 2500w`})}),_jsx(_components.p,{children:_jsx(_components.a,{href:`/images/dashboard/school/reports--generate.jpg`,children:`Open full-size screenshot`})})]}),_jsx(Step,{title:`Set the scope`,children:_jsxs(_components.p,{children:[`Use `,_jsx(_components.strong,{children:`Academic year`}),` and `,_jsx(_components.strong,{children:`Term`}),` to limit the course data included. Use `,_jsx(_components.strong,{children:`Course`}),`, `,_jsx(_components.strong,{children:`Roster`}),`, and `,_jsx(_components.strong,{children:`Enrollment status`}),` to narrow the student group. These are separate choices: limiting who receives a report is not the same as limiting the academic period on it.`]})}),_jsx(Step,{title:`Choose students`,children:_jsx(_components.p,{children:`Review the matching students, search by name or email, and select the students to include. You must choose at least one student.`})}),_jsx(Step,{title:`Review and generate`,children:_jsxs(_components.p,{children:[`Enter a `,_jsx(_components.strong,{children:`Batch name (optional)`}),` to help find the run later. Under `,_jsx(_components.strong,{children:`Who can access these reports?`}),`, choose `,_jsx(_components.strong,{children:`Student access`}),` or `,_jsx(_components.strong,{children:`Internal`}),`. Review the template and selection, then click `,_jsx(_components.strong,{children:`Generate N reports`}),` (the button shows the number of selected students). Manual generation creates drafts.`]})}),_jsx(Step,{title:`Review and approve`,children:_jsxs(_components.p,{children:[`Open `,_jsx(_components.strong,{children:`History`}),`, inspect each draft with `,_jsx(_components.strong,{children:`View report`}),`, and click `,_jsx(_components.strong,{children:`Approve`}),` when it is ready to become official. You can select multiple reports and approve them together.`]})}),_jsx(Step,{title:`Print or save as PDF`,children:_jsxs(_components.p,{children:[`Open a report and click `,_jsx(_components.strong,{children:`Print`}),`, then use your browser’s print dialog to print or save a PDF. For a batch, filter History to that batch and use `,_jsx(_components.strong,{children:`Bulk Print`}),`.`]})})]}),`\n`,_jsx(Note,{children:_jsx(_components.p,{children:`A generated report is a saved snapshot. Correct source grades or attendance before generating the official version. Editing source data afterward does not rewrite an already generated report.`})}),`\n`,_jsx(Heading,{level:`2`,id:`review-report-history`,children:`Review report history`}),`\n`,_jsxs(_components.p,{children:[`Use `,_jsx(_components.strong,{children:`History`}),` to find previous reports and batches. Reports show their status, access level, and email state.`]}),`\n`,_jsxs(_components.ul,{children:[`\n`,_jsxs(_components.li,{children:[_jsx(_components.strong,{children:`Draft`}),` — review, approve, or delete the draft.`]}),`\n`,_jsxs(_components.li,{children:[_jsx(_components.strong,{children:`Official`}),` — print, email if it has student access, or revoke it when it should no longer be treated as official.`]}),`\n`,_jsxs(_components.li,{children:[_jsx(_components.strong,{children:`Revoked`}),` — retained as a record of the earlier report’s status.`]}),`\n`]}),`\n`,_jsxs(_components.p,{children:[`Approving and emailing are separate actions. Follow `,_jsx(_components.a,{href:`#emailing-reports`,children:`Emailing reports`}),` when you are ready to notify families.`]}),`\n`,_jsx(Frame,{caption:`Northstar demo — Reports — History`,children:_jsx(OptimizedImage,{src:`https://mintcdn.com/deandesk/Ib88bqpYdQ7_QHTP/images/dashboard/school/reports--history.jpg?fit=max\u0026auto=format\u0026n=Ib88bqpYdQ7_QHTP\u0026q=85\u0026s=e23b04b6a8580e374c9ad05769ec986c`,alt:`Northstar demo: Reports — History`,loading:`lazy`,\"data-og-width\":`1440`,width:`1440`,\"data-og-height\":`1000`,height:`1000`,\"data-path\":`images/dashboard/school/reports--history.jpg`,\"data-optimize\":`true`,\"data-opv\":`3`,srcset:`https://mintcdn.com/deandesk/Ib88bqpYdQ7_QHTP/images/dashboard/school/reports--history.jpg?w=280\u0026fit=max\u0026auto=format\u0026n=Ib88bqpYdQ7_QHTP\u0026q=85\u0026s=6429e5857cae7578ee70161f7a759a33 280w, https://mintcdn.com/deandesk/Ib88bqpYdQ7_QHTP/images/dashboard/school/reports--history.jpg?w=560\u0026fit=max\u0026auto=format\u0026n=Ib88bqpYdQ7_QHTP\u0026q=85\u0026s=fc17027f7f41717dddd4b6c4da825921 560w, https://mintcdn.com/deandesk/Ib88bqpYdQ7_QHTP/images/dashboard/school/reports--history.jpg?w=840\u0026fit=max\u0026auto=format\u0026n=Ib88bqpYdQ7_QHTP\u0026q=85\u0026s=6a1f51ff820ab0ac57a8d7e86702b8c3 840w, https://mintcdn.com/deandesk/Ib88bqpYdQ7_QHTP/images/dashboard/school/reports--history.jpg?w=1100\u0026fit=max\u0026auto=format\u0026n=Ib88bqpYdQ7_QHTP\u0026q=85\u0026s=b7ad3632431ecef55b00f184b0b910e6 1100w, https://mintcdn.com/deandesk/Ib88bqpYdQ7_QHTP/images/dashboard/school/reports--history.jpg?w=1650\u0026fit=max\u0026auto=format\u0026n=Ib88bqpYdQ7_QHTP\u0026q=85\u0026s=7a1024c74106f82947a505fccbda0df5 1650w, https://mintcdn.com/deandesk/Ib88bqpYdQ7_QHTP/images/dashboard/school/reports--history.jpg?w=2500\u0026fit=max\u0026auto=format\u0026n=Ib88bqpYdQ7_QHTP\u0026q=85\u0026s=ee744777b6f35e9d598a9e955a94d177 2500w`})}),`\n`,_jsx(_components.p,{children:_jsx(_components.a,{href:`/images/dashboard/school/reports--history.jpg`,children:`Open full-size screenshot`})}),`\n`,_jsx(Heading,{level:`2`,id:`report-templates`,children:`Report templates`}),`\n`,_jsxs(_components.p,{children:[`The `,_jsx(_components.strong,{children:`Templates`}),` tab of the Reports dashboard is where you design reusable, school-branded formats for academic reports. When you generate a report — or set up a `,_jsx(_components.a,{href:`#recurring-report-schedules`,children:`recurring schedule`}),` — you pick one of these templates.`]}),`\n`,_jsxs(_components.p,{children:[`Each template card shows its name, description, font, paper size, and how many fields it includes. Click `,_jsx(_components.strong,{children:`Create Template`}),` at the top of the tab (or `,_jsx(_components.strong,{children:`Create template`}),` when no templates exist yet) to build a new one, or `,_jsx(_components.strong,{children:`Customize`}),` on an existing card to edit it. Deleting a template does not affect reports already generated with it.`]}),`\n`,_jsx(Frame,{caption:`Northstar demo — Reports — Templates`,children:_jsx(OptimizedImage,{src:`https://mintcdn.com/deandesk/Ib88bqpYdQ7_QHTP/images/dashboard/school/reports--templates.jpg?fit=max\u0026auto=format\u0026n=Ib88bqpYdQ7_QHTP\u0026q=85\u0026s=dea5dd99d406cdec611dfbbf4e979eba`,alt:`Northstar demo: Reports — Templates`,loading:`lazy`,\"data-og-width\":`1440`,width:`1440`,\"data-og-height\":`1000`,height:`1000`,\"data-path\":`images/dashboard/school/reports--templates.jpg`,\"data-optimize\":`true`,\"data-opv\":`3`,srcset:`https://mintcdn.com/deandesk/Ib88bqpYdQ7_QHTP/images/dashboard/school/reports--templates.jpg?w=280\u0026fit=max\u0026auto=format\u0026n=Ib88bqpYdQ7_QHTP\u0026q=85\u0026s=eeec49c6c1e5612c681f9f56c49d7bf1 280w, https://mintcdn.com/deandesk/Ib88bqpYdQ7_QHTP/images/dashboard/school/reports--templates.jpg?w=560\u0026fit=max\u0026auto=format\u0026n=Ib88bqpYdQ7_QHTP\u0026q=85\u0026s=a07a09639a4ddba6cdd3955e69ee4043 560w, https://mintcdn.com/deandesk/Ib88bqpYdQ7_QHTP/images/dashboard/school/reports--templates.jpg?w=840\u0026fit=max\u0026auto=format\u0026n=Ib88bqpYdQ7_QHTP\u0026q=85\u0026s=aaf868599a33001184169da5e13d3c5c 840w, https://mintcdn.com/deandesk/Ib88bqpYdQ7_QHTP/images/dashboard/school/reports--templates.jpg?w=1100\u0026fit=max\u0026auto=format\u0026n=Ib88bqpYdQ7_QHTP\u0026q=85\u0026s=048f736d0bd2bf5337e95b0f47fdb12b 1100w, https://mintcdn.com/deandesk/Ib88bqpYdQ7_QHTP/images/dashboard/school/reports--templates.jpg?w=1650\u0026fit=max\u0026auto=format\u0026n=Ib88bqpYdQ7_QHTP\u0026q=85\u0026s=5b5ca7bc905fffb1ef5dc445941a78ff 1650w, https://mintcdn.com/deandesk/Ib88bqpYdQ7_QHTP/images/dashboard/school/reports--templates.jpg?w=2500\u0026fit=max\u0026auto=format\u0026n=Ib88bqpYdQ7_QHTP\u0026q=85\u0026s=d13fd1d46c509ad93b667766a1416db3 2500w`})}),`\n`,_jsx(_components.p,{children:_jsx(_components.a,{href:`/images/dashboard/school/reports--templates.jpg`,children:`Open full-size screenshot`})}),`\n`,_jsx(Heading,{level:`3`,id:`the-template-designer`,children:`The template designer`}),`\n`,_jsxs(_components.p,{children:[`Creating or customizing a template opens a full-screen designer with editing controls on the left and a `,_jsx(_components.strong,{children:`live document preview`}),` on the right — changes appear in the preview immediately. The controls are organized into four tabs:`]}),`\n`,_jsx(Heading,{level:`4`,id:`content`,children:`Content`}),`\n`,_jsxs(_components.ul,{children:[`\n`,_jsxs(_components.li,{children:[_jsx(_components.strong,{children:`Template details`}),` — the template’s name (required) and description.`]}),`\n`,_jsxs(_components.li,{children:[_jsx(_components.strong,{children:`Report fields`}),` — checkboxes for the student information that appears: `,_jsx(_components.strong,{children:`Courses`}),`, `,_jsx(_components.strong,{children:`Grades`}),`, `,_jsx(_components.strong,{children:`GPA`}),`, `,_jsx(_components.strong,{children:`Attendance`}),`, `,_jsx(_components.strong,{children:`Assignments`}),`, `,_jsx(_components.strong,{children:`Instructor`}),`, `,_jsx(_components.strong,{children:`Enrollment dates`}),`, `,_jsx(_components.strong,{children:`Enrollment status`}),`, `,_jsx(_components.strong,{children:`Numerical score`}),`, `,_jsx(_components.strong,{children:`Grade comments`}),`, `,_jsx(_components.strong,{children:`Term`}),`, `,_jsx(_components.strong,{children:`Course description`}),`, and `,_jsx(_components.strong,{children:`Disciplinary records`}),`.`]}),`\n`,_jsxs(_components.li,{children:[_jsx(_components.strong,{children:`Section labels`}),` — rename the report title and the course, attendance, comments, and disciplinary section headings to match your school’s terminology.`]}),`\n`,_jsxs(_components.li,{children:[_jsx(_components.strong,{children:`Footer`}),` — set custom footer text, and choose whether to show the official/draft status and page numbers.`]}),`\n`]}),`\n`,_jsx(Frame,{caption:`Northstar demo — Reports — Templates — Content`,children:_jsx(OptimizedImage,{src:`https://mintcdn.com/deandesk/Ib88bqpYdQ7_QHTP/images/dashboard/school/reports-templates--content.jpg?fit=max\u0026auto=format\u0026n=Ib88bqpYdQ7_QHTP\u0026q=85\u0026s=a23ba559a3261a129d1cb3f6fed229e0`,alt:`Northstar demo: Reports — Templates — Content`,loading:`lazy`,\"data-og-width\":`1440`,width:`1440`,\"data-og-height\":`1000`,height:`1000`,\"data-path\":`images/dashboard/school/reports-templates--content.jpg`,\"data-optimize\":`true`,\"data-opv\":`3`,srcset:`https://mintcdn.com/deandesk/Ib88bqpYdQ7_QHTP/images/dashboard/school/reports-templates--content.jpg?w=280\u0026fit=max\u0026auto=format\u0026n=Ib88bqpYdQ7_QHTP\u0026q=85\u0026s=e2789960334630756939c26baa82d398 280w, https://mintcdn.com/deandesk/Ib88bqpYdQ7_QHTP/images/dashboard/school/reports-templates--content.jpg?w=560\u0026fit=max\u0026auto=format\u0026n=Ib88bqpYdQ7_QHTP\u0026q=85\u0026s=5002b53cafd6a189e86579d6976b10a2 560w, https://mintcdn.com/deandesk/Ib88bqpYdQ7_QHTP/images/dashboard/school/reports-templates--content.jpg?w=840\u0026fit=max\u0026auto=format\u0026n=Ib88bqpYdQ7_QHTP\u0026q=85\u0026s=b92404bdcafdc03838694a4e396033ea 840w, https://mintcdn.com/deandesk/Ib88bqpYdQ7_QHTP/images/dashboard/school/reports-templates--content.jpg?w=1100\u0026fit=max\u0026auto=format\u0026n=Ib88bqpYdQ7_QHTP\u0026q=85\u0026s=63df999760461c91396043fb90783991 1100w, https://mintcdn.com/deandesk/Ib88bqpYdQ7_QHTP/images/dashboard/school/reports-templates--content.jpg?w=1650\u0026fit=max\u0026auto=format\u0026n=Ib88bqpYdQ7_QHTP\u0026q=85\u0026s=2ef6dab783cbfee4f1d72a13a02a5024 1650w, https://mintcdn.com/deandesk/Ib88bqpYdQ7_QHTP/images/dashboard/school/reports-templates--content.jpg?w=2500\u0026fit=max\u0026auto=format\u0026n=Ib88bqpYdQ7_QHTP\u0026q=85\u0026s=7cb41cc51da26f55207ab3635236afd5 2500w`})}),`\n`,_jsx(_components.p,{children:_jsx(_components.a,{href:`/images/dashboard/school/reports-templates--content.jpg`,children:`Open full-size screenshot`})}),`\n`,_jsx(Heading,{level:`4`,id:`letterhead`,children:`Letterhead`}),`\n`,_jsxs(_components.ul,{children:[`\n`,_jsxs(_components.li,{children:[_jsx(_components.strong,{children:`Identity`}),` — override the school name, add a subtitle (e.g. “Office of Academic Records”), and add a contact or accreditation line. Leave fields blank to use your school profile.`]}),`\n`,_jsxs(_components.li,{children:[_jsx(_components.strong,{children:`Logo`}),` — show or hide the logo, override the logo image, and adjust its width. The school profile logo is used by default.`]}),`\n`,_jsxs(_components.li,{children:[_jsx(_components.strong,{children:`Header arrangement`}),` — choose a `,_jsx(_components.strong,{children:`Classic`}),`, `,_jsx(_components.strong,{children:`Compact`}),`, or `,_jsx(_components.strong,{children:`Banner`}),` style; left, center, or right alignment; and whether to show a divider under the letterhead.`]}),`\n`]}),`\n`,_jsx(Frame,{caption:`Northstar demo — Reports — Templates — Letterhead`,children:_jsx(OptimizedImage,{src:`https://mintcdn.com/deandesk/Ib88bqpYdQ7_QHTP/images/dashboard/school/reports-templates--letterhead.jpg?fit=max\u0026auto=format\u0026n=Ib88bqpYdQ7_QHTP\u0026q=85\u0026s=bdefeb910812dae06761e3ba4cc2f141`,alt:`Northstar demo: Reports — Templates — Letterhead`,loading:`lazy`,\"data-og-width\":`1440`,width:`1440`,\"data-og-height\":`1000`,height:`1000`,\"data-path\":`images/dashboard/school/reports-templates--letterhead.jpg`,\"data-optimize\":`true`,\"data-opv\":`3`,srcset:`https://mintcdn.com/deandesk/Ib88bqpYdQ7_QHTP/images/dashboard/school/reports-templates--letterhead.jpg?w=280\u0026fit=max\u0026auto=format\u0026n=Ib88bqpYdQ7_QHTP\u0026q=85\u0026s=24a49c0998d8204590bc2d06e558b4f6 280w, https://mintcdn.com/deandesk/Ib88bqpYdQ7_QHTP/images/dashboard/school/reports-templates--letterhead.jpg?w=560\u0026fit=max\u0026auto=format\u0026n=Ib88bqpYdQ7_QHTP\u0026q=85\u0026s=30f78a615db4bb0c5465bbdaaee78315 560w, https://mintcdn.com/deandesk/Ib88bqpYdQ7_QHTP/images/dashboard/school/reports-templates--letterhead.jpg?w=840\u0026fit=max\u0026auto=format\u0026n=Ib88bqpYdQ7_QHTP\u0026q=85\u0026s=17d6ffe28ffa22ef65a6adb0556ee1f7 840w, https://mintcdn.com/deandesk/Ib88bqpYdQ7_QHTP/images/dashboard/school/reports-templates--letterhead.jpg?w=1100\u0026fit=max\u0026auto=format\u0026n=Ib88bqpYdQ7_QHTP\u0026q=85\u0026s=0bacb69990b4124a83079db092ec62e4 1100w, https://mintcdn.com/deandesk/Ib88bqpYdQ7_QHTP/images/dashboard/school/reports-templates--letterhead.jpg?w=1650\u0026fit=max\u0026auto=format\u0026n=Ib88bqpYdQ7_QHTP\u0026q=85\u0026s=b30549f731260d76da7ed67875f01aba 1650w, https://mintcdn.com/deandesk/Ib88bqpYdQ7_QHTP/images/dashboard/school/reports-templates--letterhead.jpg?w=2500\u0026fit=max\u0026auto=format\u0026n=Ib88bqpYdQ7_QHTP\u0026q=85\u0026s=baaf807ebd4d31a000411c4a90480ecc 2500w`})}),`\n`,_jsx(_components.p,{children:_jsx(_components.a,{href:`/images/dashboard/school/reports-templates--letterhead.jpg`,children:`Open full-size screenshot`})}),`\n`,_jsx(Heading,{level:`4`,id:`type-\u0026-color`,children:`Type \u0026 color`}),`\n`,_jsxs(_components.ul,{children:[`\n`,_jsxs(_components.li,{children:[_jsx(_components.strong,{children:`Typography`}),` — pick a print-safe font family (Arial, Helvetica, Georgia, Times New Roman, Trebuchet MS, or Verdana) and adjust body, title, and section heading sizes plus line spacing.`]}),`\n`,_jsxs(_components.li,{children:[_jsx(_components.strong,{children:`Colors`}),` — set the colors for headings and accents, body text, secondary text, lines and borders, and table fills. These apply to the report only, not your website theme.`]}),`\n`]}),`\n`,_jsx(Frame,{caption:`Northstar demo — Reports — Templates — Type \u0026 color`,children:_jsx(OptimizedImage,{src:`https://mintcdn.com/deandesk/Ib88bqpYdQ7_QHTP/images/dashboard/school/reports-templates--type-color.jpg?fit=max\u0026auto=format\u0026n=Ib88bqpYdQ7_QHTP\u0026q=85\u0026s=71a710365cc243383004d96559a46a99`,alt:`Northstar demo: Reports — Templates — Type \u0026 color`,loading:`lazy`,\"data-og-width\":`1440`,width:`1440`,\"data-og-height\":`1000`,height:`1000`,\"data-path\":`images/dashboard/school/reports-templates--type-color.jpg`,\"data-optimize\":`true`,\"data-opv\":`3`,srcset:`https://mintcdn.com/deandesk/Ib88bqpYdQ7_QHTP/images/dashboard/school/reports-templates--type-color.jpg?w=280\u0026fit=max\u0026auto=format\u0026n=Ib88bqpYdQ7_QHTP\u0026q=85\u0026s=3102871cdee872c21842f4eba8530a77 280w, https://mintcdn.com/deandesk/Ib88bqpYdQ7_QHTP/images/dashboard/school/reports-templates--type-color.jpg?w=560\u0026fit=max\u0026auto=format\u0026n=Ib88bqpYdQ7_QHTP\u0026q=85\u0026s=8ab6c429b3f429af35022a98c6b1bc12 560w, https://mintcdn.com/deandesk/Ib88bqpYdQ7_QHTP/images/dashboard/school/reports-templates--type-color.jpg?w=840\u0026fit=max\u0026auto=format\u0026n=Ib88bqpYdQ7_QHTP\u0026q=85\u0026s=13a3e7a5258d5c774ca06b9738d855e2 840w, https://mintcdn.com/deandesk/Ib88bqpYdQ7_QHTP/images/dashboard/school/reports-templates--type-color.jpg?w=1100\u0026fit=max\u0026auto=format\u0026n=Ib88bqpYdQ7_QHTP\u0026q=85\u0026s=36e5334844989c587f5209253fc6b1c0 1100w, https://mintcdn.com/deandesk/Ib88bqpYdQ7_QHTP/images/dashboard/school/reports-templates--type-color.jpg?w=1650\u0026fit=max\u0026auto=format\u0026n=Ib88bqpYdQ7_QHTP\u0026q=85\u0026s=1c04a61276118623bdc35ce053eb7957 1650w, https://mintcdn.com/deandesk/Ib88bqpYdQ7_QHTP/images/dashboard/school/reports-templates--type-color.jpg?w=2500\u0026fit=max\u0026auto=format\u0026n=Ib88bqpYdQ7_QHTP\u0026q=85\u0026s=f0f11c23effafb048d6233a8d93c88eb 2500w`})}),`\n`,_jsx(_components.p,{children:_jsx(_components.a,{href:`/images/dashboard/school/reports-templates--type-color.jpg`,children:`Open full-size screenshot`})}),`\n`,_jsx(Heading,{level:`4`,id:`layout`,children:`Layout`}),`\n`,_jsxs(_components.ul,{children:[`\n`,_jsxs(_components.li,{children:[_jsx(_components.strong,{children:`Page`}),` — US Letter or A4, portrait or landscape, and all four margins.`]}),`\n`,_jsxs(_components.li,{children:[_jsx(_components.strong,{children:`Section order`}),` — reorder the report’s sections (Student details, Academic summary, Course history, Attendance, Grade comments, Disciplinary record, Approval details) with the up and down arrows.`]}),`\n`,_jsxs(_components.li,{children:[_jsx(_components.strong,{children:`Information layout`}),` — choose the density, the academic summary style, the course table style, and whether student details use one or two columns.`]}),`\n`]}),`\n`,_jsxs(_components.p,{children:[`Use `,_jsx(_components.strong,{children:`Reset format`}),` in the designer header to restore all formatting to your school defaults, then `,_jsx(_components.strong,{children:`Create template`}),` or `,_jsx(_components.strong,{children:`Save changes`}),` to finish.`]}),`\n`,_jsx(Warning,{children:_jsxs(_components.p,{children:[`If you include `,_jsx(_components.strong,{children:`Disciplinary records`}),`, the report includes all available disciplinary records for the student; academic scope filters only limit course data. These records become visible to students or guardians when the report is official and has `,_jsx(_components.strong,{children:`Student access`}),`. The field also requires disciplinary records to be enabled in `,_jsx(_components.a,{href:`/setup/school-settings#disciplinary-records`,children:`School configuration`}),`.`]})}),`\n`,_jsx(Frame,{caption:`Northstar demo — Reports — Templates — Layout`,children:_jsx(OptimizedImage,{src:`https://mintcdn.com/deandesk/Ib88bqpYdQ7_QHTP/images/dashboard/school/reports-templates--layout.jpg?fit=max\u0026auto=format\u0026n=Ib88bqpYdQ7_QHTP\u0026q=85\u0026s=2a7410ee80dd2043901b97d6f04c3d29`,alt:`Northstar demo: Reports — Templates — Layout`,loading:`lazy`,\"data-og-width\":`1440`,width:`1440`,\"data-og-height\":`1000`,height:`1000`,\"data-path\":`images/dashboard/school/reports-templates--layout.jpg`,\"data-optimize\":`true`,\"data-opv\":`3`,srcset:`https://mintcdn.com/deandesk/Ib88bqpYdQ7_QHTP/images/dashboard/school/reports-templates--layout.jpg?w=280\u0026fit=max\u0026auto=format\u0026n=Ib88bqpYdQ7_QHTP\u0026q=85\u0026s=c0d3942db3a86971819b0fff1bb89339 280w, https://mintcdn.com/deandesk/Ib88bqpYdQ7_QHTP/images/dashboard/school/reports-templates--layout.jpg?w=560\u0026fit=max\u0026auto=format\u0026n=Ib88bqpYdQ7_QHTP\u0026q=85\u0026s=7a177317767147a6946031b05063858d 560w, https://mintcdn.com/deandesk/Ib88bqpYdQ7_QHTP/images/dashboard/school/reports-templates--layout.jpg?w=840\u0026fit=max\u0026auto=format\u0026n=Ib88bqpYdQ7_QHTP\u0026q=85\u0026s=490cb63925b0c8901de3a1195a6e780b 840w, https://mintcdn.com/deandesk/Ib88bqpYdQ7_QHTP/images/dashboard/school/reports-templates--layout.jpg?w=1100\u0026fit=max\u0026auto=format\u0026n=Ib88bqpYdQ7_QHTP\u0026q=85\u0026s=af511856d715855c1706bf05fefc76ef 1100w, https://mintcdn.com/deandesk/Ib88bqpYdQ7_QHTP/images/dashboard/school/reports-templates--layout.jpg?w=1650\u0026fit=max\u0026auto=format\u0026n=Ib88bqpYdQ7_QHTP\u0026q=85\u0026s=c29dd92cb875d6958bc1e813bb2b85ce 1650w, https://mintcdn.com/deandesk/Ib88bqpYdQ7_QHTP/images/dashboard/school/reports-templates--layout.jpg?w=2500\u0026fit=max\u0026auto=format\u0026n=Ib88bqpYdQ7_QHTP\u0026q=85\u0026s=3ab2a6d625c5133e64a7e5dd0db23821 2500w`})}),`\n`,_jsx(_components.p,{children:_jsx(_components.a,{href:`/images/dashboard/school/reports-templates--layout.jpg`,children:`Open full-size screenshot`})}),`\n`,_jsx(Heading,{level:`2`,id:`report-access-levels`,children:`Report access levels`}),`\n`,_jsxs(_components.p,{children:[`Every generated student report has an access level that controls who can see it. You choose it at generation time under `,_jsx(_components.strong,{children:`Who can access these reports?`}),`:`]}),`\n`,_jsxs(Table,{children:[_jsx(_components.thead,{children:_jsxs(_components.tr,{children:[_jsx(_components.th,{children:`Access level`}),_jsx(_components.th,{children:`Who can view it`})]})}),_jsxs(_components.tbody,{children:[_jsxs(_components.tr,{children:[_jsxs(_components.td,{children:[_jsx(_components.strong,{children:`Student access`}),` (default)`]}),_jsx(_components.td,{children:`Admins can review it; the student and authorized parents or guardians can view it once official. The official report appears on the student’s Transcript page.`})]}),_jsxs(_components.tr,{children:[_jsx(_components.td,{children:_jsx(_components.strong,{children:`Internal`})}),_jsx(_components.td,{children:`Only admins can view it. Internal reports cannot be emailed.`})]})]})]}),`\n`,_jsxs(_components.p,{children:[`You can change a report’s access level at any time after generation — open the report from the `,_jsx(_components.strong,{children:`History`}),` tab and switch between `,_jsx(_components.strong,{children:`Student \u0026 family access`}),` and `,_jsx(_components.strong,{children:`Internal · admins only`}),`. Reports in the History tab carry an `,_jsx(_components.strong,{children:`Admins only`}),` or `,_jsx(_components.strong,{children:`Student access`}),` badge so you can tell them apart at a glance.`]}),`\n`,_jsx(Heading,{level:`2`,id:`emailing-reports`,children:`Emailing reports`}),`\n`,_jsx(_components.p,{children:`Approving a report no longer notifies students or families automatically. Emailing is a separate, explicit step:`}),`\n`,_jsxs(Steps,{children:[_jsx(Step,{title:`Open the History tab`,children:_jsxs(_components.p,{children:[`Go to the `,_jsx(_components.strong,{children:`History`}),` tab of the Reports dashboard.`]})}),_jsx(Step,{title:`Email one report or many`,children:_jsxs(_components.p,{children:[`Click the mail icon (`,_jsx(_components.strong,{children:`Email report`}),`) on a report’s row, or select multiple reports and use the bulk `,_jsx(_components.strong,{children:`Email`}),` action. Emailing is available for `,_jsx(_components.strong,{children:`Official`}),` reports with `,_jsx(_components.strong,{children:`Student access`}),`.`]})}),_jsx(Step,{title:`DeanDesk delivers the report`,children:_jsx(_components.p,{children:`Adult students receive the report themselves. For a child, the report is emailed to the child’s parents.`})})]}),`\n`,_jsxs(_components.p,{children:[`You can re-send a report at any time with `,_jsx(_components.strong,{children:`Email report again`}),`. DeanDesk records who emailed it, when, and how many times it has been sent, and emailed reports show an `,_jsx(_components.strong,{children:`Emailed`}),` badge in the History tab.`]}),`\n`,_jsx(Warning,{children:_jsxs(_components.p,{children:[`Internal reports cannot be emailed. Change the report’s access level to `,_jsx(_components.strong,{children:`Student \u0026 family access`}),` first.`]})}),`\n`,_jsx(Heading,{level:`2`,id:`recurring-report-schedules`,children:`Recurring report schedules`}),`\n`,_jsxs(_components.p,{children:[`The `,_jsx(_components.strong,{children:`Schedules`}),` tab on the Reports dashboard lets you generate and email fresh official reports automatically each week or month.`]}),`\n`,_jsxs(Steps,{children:[_jsx(Step,{title:`Create a schedule`,children:_jsxs(_components.p,{children:[`In the `,_jsx(_components.strong,{children:`Schedules`}),` tab, click `,_jsx(_components.strong,{children:`New schedule`}),`.`]})}),_jsx(Step,{title:`Name it and pick a template`,children:_jsx(_components.p,{children:`Enter a schedule name and choose the report template each run should use.`})}),_jsx(Step,{title:`Set the cadence`,children:_jsxs(_components.p,{children:[`Choose a `,_jsx(_components.strong,{children:`Frequency`}),` of `,_jsx(_components.strong,{children:`Weekly`}),` (pick a day of the week) or `,_jsx(_components.strong,{children:`Monthly`}),` (pick a day of the month, 1–28), then set the time of day the run should start, in your school’s timezone.`]})}),_jsx(Step,{title:`Scope the students (optional)`,children:_jsxs(_components.p,{children:[`Under `,_jsx(_components.strong,{children:`Dynamic student and academic scope`}),`, filter by academic year, term, course, roster, or enrollment status (All, Active, Completed, or Withdrawn). Filters are resolved fresh on every run, so students who newly match are included automatically.`]})})]}),`\n`,_jsxs(_components.p,{children:[`Each schedule in the table shows its cadence (e.g. “Every Monday at 08:00”), its template, its `,_jsx(_components.strong,{children:`Next run`}),`, its `,_jsx(_components.strong,{children:`Last result`}),` (how many reports were generated, emailed, or failed), and a status of `,_jsx(_components.strong,{children:`Active`}),` or `,_jsx(_components.strong,{children:`Paused`}),`. Use the row actions to pause, resume, or delete a schedule — deleting a schedule keeps the reports it already generated.`]}),`\n`,_jsx(Note,{children:_jsxs(_components.p,{children:[`Scheduled reports do not require approval. Each run uses the latest matching students and academic data, then emails the reports automatically. Reports created by a schedule are tagged `,_jsx(_components.strong,{children:`Scheduled`}),` in the History tab, so you can distinguish them from manually generated reports.`]})}),`\n`,_jsx(Frame,{caption:`Northstar demo — Reports — Schedules`,children:_jsx(OptimizedImage,{src:`https://mintcdn.com/deandesk/Ib88bqpYdQ7_QHTP/images/dashboard/school/reports--schedules.jpg?fit=max\u0026auto=format\u0026n=Ib88bqpYdQ7_QHTP\u0026q=85\u0026s=4f2af121f5740a710f60c74f7008be8e`,alt:`Northstar demo: Reports — Schedules`,loading:`lazy`,\"data-og-width\":`1440`,width:`1440`,\"data-og-height\":`1000`,height:`1000`,\"data-path\":`images/dashboard/school/reports--schedules.jpg`,\"data-optimize\":`true`,\"data-opv\":`3`,srcset:`https://mintcdn.com/deandesk/Ib88bqpYdQ7_QHTP/images/dashboard/school/reports--schedules.jpg?w=280\u0026fit=max\u0026auto=format\u0026n=Ib88bqpYdQ7_QHTP\u0026q=85\u0026s=77d1e645f94dcfc8abac20577bc0d285 280w, https://mintcdn.com/deandesk/Ib88bqpYdQ7_QHTP/images/dashboard/school/reports--schedules.jpg?w=560\u0026fit=max\u0026auto=format\u0026n=Ib88bqpYdQ7_QHTP\u0026q=85\u0026s=a16a909bc10fb62f9d303dd445c09477 560w, https://mintcdn.com/deandesk/Ib88bqpYdQ7_QHTP/images/dashboard/school/reports--schedules.jpg?w=840\u0026fit=max\u0026auto=format\u0026n=Ib88bqpYdQ7_QHTP\u0026q=85\u0026s=166920397010d144cd6bf4792e91e172 840w, https://mintcdn.com/deandesk/Ib88bqpYdQ7_QHTP/images/dashboard/school/reports--schedules.jpg?w=1100\u0026fit=max\u0026auto=format\u0026n=Ib88bqpYdQ7_QHTP\u0026q=85\u0026s=c6c4fb356fdcedc442c81a8188a88e35 1100w, https://mintcdn.com/deandesk/Ib88bqpYdQ7_QHTP/images/dashboard/school/reports--schedules.jpg?w=1650\u0026fit=max\u0026auto=format\u0026n=Ib88bqpYdQ7_QHTP\u0026q=85\u0026s=fb602eab39486eb987bf4761ab449a05 1650w, https://mintcdn.com/deandesk/Ib88bqpYdQ7_QHTP/images/dashboard/school/reports--schedules.jpg?w=2500\u0026fit=max\u0026auto=format\u0026n=Ib88bqpYdQ7_QHTP\u0026q=85\u0026s=eecfd48d9d9238002939e97d95b8b474 2500w`})}),`\n`,_jsx(_components.p,{children:_jsx(_components.a,{href:`/images/dashboard/school/reports--schedules.jpg`,children:`Open full-size screenshot`})}),`\n`,_jsx(Heading,{level:`2`,id:`using-reports-for-compliance-and-audits`,children:`Using reports for compliance and audits`}),`\n`,_jsx(_components.p,{children:`Student reports can support external audits, accreditation reviews, and regulatory reporting.`}),`\n`,_jsxs(_components.ul,{children:[`\n`,_jsxs(_components.li,{children:[_jsx(_components.strong,{children:`Attendance records`}),` serve as documentation for institutions required to track attendance by law or accreditation standards.`]}),`\n`,_jsxs(_components.li,{children:[_jsx(_components.strong,{children:`Transcripts`}),` provide official academic records for students applying to other institutions.`]}),`\n`,_jsxs(_components.li,{children:[_jsx(_components.strong,{children:`Enrollment reports`}),` verify headcount and program participation for government or grant reporting.`]}),`\n`]}),`\n`,_jsx(Tip,{children:_jsx(_components.p,{children:`Export and archive reports at the end of each term. Retaining historical exports gives you a consistent audit trail even if data is updated later.`})}),`\n`,_jsx(Heading,{level:`2`,id:`sharing-reports-with-parents-or-students`,children:`Sharing reports with parents or students`}),`\n`,_jsxs(_components.p,{children:[`For official student reports, use the `,_jsx(_components.strong,{children:`Email report`}),` action described in `,_jsx(_components.a,{href:`#emailing-reports`,children:`Emailing reports`}),` above — adult students receive their own copy, and a child’s report goes to their parents. Official reports with `,_jsx(_components.strong,{children:`Student access`}),` also appear on the student’s Transcript page.`]}),`\n`,_jsxs(_components.p,{children:[`Use `,_jsx(_components.strong,{children:`Print`}),` to create a PDF copy for sharing outside DeanDesk. Students can review the official reports made available to them from `,_jsx(_components.strong,{children:`My Transcript`}),` in their profile; they do not generate new official reports themselves.`]}),`\n`,_jsx(Heading,{level:`2`,id:`reports-workspace-tabs`,children:`Reports workspace tabs`}),`\n`,_jsxs(Table,{children:[_jsx(_components.thead,{children:_jsxs(_components.tr,{children:[_jsx(_components.th,{children:`Tab`}),_jsx(_components.th,{children:`Capabilities`})]})}),_jsxs(_components.tbody,{children:[_jsxs(_components.tr,{children:[_jsx(_components.td,{children:_jsx(_components.strong,{children:`Dashboard`})}),_jsx(_components.td,{children:`View report totals, this month’s activity, pending drafts, official reports, and recent report activity; open the corresponding work queue.`})]}),_jsxs(_components.tr,{children:[_jsx(_components.td,{children:_jsx(_components.strong,{children:`Generate`})}),_jsx(_components.td,{children:`Select students, report settings, and a template; generate reports and review the output.`})]}),_jsxs(_components.tr,{children:[_jsx(_components.td,{children:_jsx(_components.strong,{children:`History`})}),_jsx(_components.td,{children:`Search existing reports, filter status or batch, preview reports, and use available export, official-status, or email actions.`})]}),_jsxs(_components.tr,{children:[_jsx(_components.td,{children:_jsx(_components.strong,{children:`Schedules`})}),_jsx(_components.td,{children:`Configure recurring report generation and delivery, then review or maintain existing schedules.`})]}),_jsxs(_components.tr,{children:[_jsx(_components.td,{children:_jsx(_components.strong,{children:`Templates`})}),_jsx(_components.td,{children:`Create and manage reusable report designs.`})]})]})]}),`\n`,_jsxs(_components.p,{children:[`The template designer has four tabs: `,_jsx(_components.strong,{children:`Content`}),` for report fields, labels, and footer; `,_jsx(_components.strong,{children:`Letterhead`}),` for identity, logo, and header arrangement; `,_jsx(_components.strong,{children:`Type \u0026 color`}),` for typography and colors; and `,_jsx(_components.strong,{children:`Layout`}),` for paper settings, section order, and information layout. Inspect the live preview before saving a template.`]})]})}function MDXContent(props={}){const{wrapper:MDXLayout}={..._provideComponents(),...props.components};return MDXLayout?_jsx(MDXLayout,{...props,children:_jsx(_createMdxContent,{...props})}):_createMdxContent(props)}return{tutorialCaptions,TutorialVideo,default:MDXContent};function _missingMdxReference(id,component){throw new Error(`Expected `+(component?`component`:`object`)+\" `\"+id+\"` to be defined: you likely forgot to import, pass, or provide it.\")}","frontmatter":{},"scope":{"config":{},"pageMetadata":{"title":"Student reports","description":"Generate attendance, grade, transcript, and enrollment reports for your students.","href":"/reports/student-reports"}}},"mdxSourceWithNoJs":null,"noJsSplices":[[134,145,"TutorialVideo=()=>null;const tutorialCap"],[2657,22260,""],[60852,60892,"TutorialVideo,tutorialCaptions,default:M"]]},"mdxExtracts":{"tableOfContents":[{"title":"Video walkthrough","slug":"video-walkthrough","depth":2,"children":[]},{"title":"Generate and export a report","slug":"generate-and-export-a-report","depth":2,"children":[]},{"title":"Review report history","slug":"review-report-history","depth":2,"children":[]},{"title":"Report templates","slug":"report-templates","depth":2,"children":[{"title":"The template designer","slug":"the-template-designer","depth":3,"children":[]},{"title":"Content","slug":"content","depth":4,"children":[]},{"title":"Letterhead","slug":"letterhead","depth":4,"children":[]},{"title":"Type \u0026 color","slug":"type-\u0026-color","depth":4,"children":[]},{"title":"Layout","slug":"layout","depth":4,"children":[]}]},{"title":"Report access levels","slug":"report-access-levels","depth":2,"children":[]},{"title":"Emailing reports","slug":"emailing-reports","depth":2,"children":[]},{"title":"Recurring report schedules","slug":"recurring-report-schedules","depth":2,"children":[]},{"title":"Using reports for compliance and audits","slug":"using-reports-for-compliance-and-audits","depth":2,"children":[]},{"title":"Sharing reports with parents or students","slug":"sharing-reports-with-parents-or-students","depth":2,"children":[]},{"title":"Reports workspace tabs","slug":"reports-workspace-tabs","depth":2,"children":[]}],"codeExamples":{}},"jsLinks":[],"subdomain":"deandesk","siteName":"DeanDesk","title":"Student reports - DeanDesk","navMaps":{"firstHrefInVersion":{},"firstHrefInLanguage":{}},"lastModified":"2026-10-20T23:06:05.199Z","originalFileLocation":"reports/student-reports.mdx"},"headHtml":"\u003cscript data-mint-head>(function(){var d=document.documentElement,p=null;if(!p){try{p=localStorage.getItem(\"isDarkMode\")}catch(e){}if(p==='true')p='dark';else if(p==='false')p='light';if(p!=='light'\u0026\u0026p!=='dark'\u0026\u0026p!=='system')p=\"system\"}var r=p==='system'?(matchMedia(\"(prefers-color-scheme: dark)\").matches?'dark':'light'):p;d.classList.remove(r==='dark'?'light':'dark');d.classList.add(r);d.setAttribute(\"data-theme-preference\",p)})();\u003c/script>\u003cmeta data-mint-head name=\"description\" content=\"Generate attendance, grade, transcript, and enrollment reports for your students.\">\u003cmeta data-mint-head name=\"application-name\" content=\"DeanDesk\">\u003cmeta data-mint-head name=\"generator\" content=\"Mintlify\">\u003clink data-mint-head rel=\"icon\" type=\"image/png\" sizes=\"192x192\" href=\"/mintlify-assets/_mintlify/favicons/deandesk/wAy75GituRfENpuV/_generated/favicon/android-chrome-192x192.png\" media=\"(prefers-color-scheme: light)\">\u003clink data-mint-head rel=\"apple-touch-icon\" type=\"image/png\" sizes=\"180x180\" href=\"/mintlify-assets/_mintlify/favicons/deandesk/wAy75GituRfENpuV/_generated/favicon/apple-touch-icon.png\">\u003clink data-mint-head rel=\"icon\" type=\"image/png\" sizes=\"16x16\" href=\"/mintlify-assets/_mintlify/favicons/deandesk/wAy75GituRfENpuV/_generated/favicon/favicon-16x16.png\" media=\"(prefers-color-scheme: light)\">\u003clink data-mint-head rel=\"icon\" type=\"image/png\" sizes=\"32x32\" href=\"/mintlify-assets/_mintlify/favicons/deandesk/wAy75GituRfENpuV/_generated/favicon/favicon-32x32.png\" media=\"(prefers-color-scheme: light)\">\u003clink data-mint-head rel=\"shortcut icon\" type=\"image/x-icon\" href=\"/mintlify-assets/_mintlify/favicons/deandesk/wAy75GituRfENpuV/_generated/favicon/favicon.ico\" media=\"(prefers-color-scheme: light)\">\u003clink data-mint-head rel=\"icon\" type=\"image/png\" sizes=\"192x192\" href=\"/mintlify-assets/_mintlify/favicons/deandesk/wAy75GituRfENpuV/_generated/favicon-dark/android-chrome-192x192.png\" media=\"(prefers-color-scheme: dark)\">\u003clink data-mint-head rel=\"icon\" type=\"image/png\" sizes=\"16x16\" href=\"/mintlify-assets/_mintlify/favicons/deandesk/wAy75GituRfENpuV/_generated/favicon-dark/favicon-16x16.png\" media=\"(prefers-color-scheme: dark)\">\u003clink data-mint-head rel=\"icon\" type=\"image/png\" sizes=\"32x32\" href=\"/mintlify-assets/_mintlify/favicons/deandesk/wAy75GituRfENpuV/_generated/favicon-dark/favicon-32x32.png\" media=\"(prefers-color-scheme: dark)\">\u003clink data-mint-head rel=\"shortcut icon\" type=\"image/x-icon\" href=\"/mintlify-assets/_mintlify/favicons/deandesk/wAy75GituRfENpuV/_generated/favicon-dark/favicon.ico\" media=\"(prefers-color-scheme: dark)\">\u003cmeta data-mint-head property=\"og:title\" content=\"Student reports - DeanDesk\">\u003cmeta data-mint-head property=\"og:description\" content=\"Generate attendance, grade, transcript, and enrollment reports for your students.\">\u003cmeta data-mint-head property=\"og:site_name\" content=\"DeanDesk\">\u003cmeta data-mint-head property=\"og:url\" content=\"https://docs.deandesk.com/reports/student-reports\">\u003cmeta data-mint-head property=\"og:type\" content=\"website\">\u003cmeta data-mint-head property=\"og:image\" content=\"https://deandesk.mintlify.app/_mintlify/api/og/v2?division=Reports+%26+Analytics\u0026amp;title=Student+reports\u0026amp;description=Generate+attendance%2C+grade%2C+transcript%2C+and+enrollment+reports+for+your+students.\u0026amp;theme=4e434e52de398c186cf0595b\u0026amp;signature=56a7e0559c05dff7b4cae9995f1f2a412f0619652e1c611bed23a686192a39c9\">\u003cmeta data-mint-head property=\"og:image:width\" content=\"1200\">\u003cmeta data-mint-head property=\"og:image:height\" content=\"630\">\u003cmeta data-mint-head name=\"twitter:card\" content=\"summary_large_image\">\u003cmeta data-mint-head name=\"twitter:title\" content=\"Student reports - DeanDesk\">\u003cmeta data-mint-head name=\"twitter:description\" content=\"Generate attendance, grade, transcript, and enrollment reports for your students.\">\u003cmeta data-mint-head name=\"twitter:image\" content=\"https://deandesk.mintlify.app/_mintlify/api/og/v2?division=Reports+%26+Analytics\u0026amp;title=Student+reports\u0026amp;description=Generate+attendance%2C+grade%2C+transcript%2C+and+enrollment+reports+for+your+students.\u0026amp;theme=4e434e52de398c186cf0595b\u0026amp;signature=56a7e0559c05dff7b4cae9995f1f2a412f0619652e1c611bed23a686192a39c9\">\u003cmeta data-mint-head name=\"twitter:image:width\" content=\"1200\">\u003cmeta data-mint-head name=\"twitter:image:height\" content=\"630\">\u003cmeta data-mint-head name=\"msapplication-config\" content=\"/mintlify-assets/_mintlify/favicons/deandesk/wAy75GituRfENpuV/_generated/favicon/browserconfig.xml\">\u003cmeta data-mint-head name=\"apple-mobile-web-app-title\" content=\"DeanDesk\">\u003cmeta data-mint-head name=\"msapplication-TileColor\" content=\"#7c7c7c\">\u003clink data-mint-head rel=\"canonical\" href=\"https://docs.deandesk.com/reports/student-reports\">\u003clink data-mint-head rel=\"alternate\" type=\"application/xml\" href=\"/sitemap.xml\">\u003clink data-mint-head rel=\"alternate\" type=\"text/markdown\" href=\"/reports/student-reports.md\">\u003cscript data-mint-head type=\"application/ld+json\">{\"@context\":\"https://schema.org\",\"@graph\":[{\"@type\":\"Organization\",\"@id\":\"https://docs.deandesk.com/#organization\",\"name\":\"DeanDesk\",\"url\":\"https://docs.deandesk.com\",\"logo\":{\"@type\":\"ImageObject\",\"url\":\"https://mintcdn.com/deandesk/fdE4kIsjz9Yc7EsS/images/logo-light.svg?fit=max\u0026auto=format\u0026n=fdE4kIsjz9Yc7EsS\u0026q=85\u0026s=36694fe1a3c1a808d37352d463b6ea86\"}},{\"@type\":\"WebSite\",\"@id\":\"https://docs.deandesk.com#website\",\"name\":\"DeanDesk\",\"url\":\"https://docs.deandesk.com\",\"publisher\":{\"@id\":\"https://docs.deandesk.com/#organization\"}},{\"@type\":\"WebPage\",\"@id\":\"https://docs.deandesk.com/reports/student-reports#webpage\",\"url\":\"https://docs.deandesk.com/reports/student-reports\",\"name\":\"Student reports\",\"description\":\"Generate attendance, grade, transcript, and enrollment reports for your students.\",\"dateModified\":\"2026-10-20T23:06:05.199Z\",\"isPartOf\":{\"@id\":\"https://docs.deandesk.com#website\"},\"breadcrumb\":{\"@id\":\"https://docs.deandesk.com/reports/student-reports#breadcrumb\"}},{\"@type\":\"BreadcrumbList\",\"@id\":\"https://docs.deandesk.com/reports/student-reports#breadcrumb\",\"itemListElement\":[{\"@type\":\"ListItem\",\"position\":1,\"name\":\"DeanDesk\",\"item\":\"https://docs.deandesk.com\"},{\"@type\":\"ListItem\",\"position\":2,\"name\":\"Student reports\",\"item\":\"https://docs.deandesk.com/reports/student-reports\"}]},{\"@type\":[\"Article\",\"TechArticle\"],\"@id\":\"https://docs.deandesk.com/reports/student-reports#article\",\"headline\":\"Student reports\",\"name\":\"Student reports\",\"description\":\"Generate attendance, grade, transcript, and enrollment reports for your students.\",\"url\":\"https://docs.deandesk.com/reports/student-reports\",\"mainEntityOfPage\":{\"@id\":\"https://docs.deandesk.com/reports/student-reports#webpage\"},\"dateModified\":\"2026-10-20T23:06:05.199Z\",\"publisher\":{\"@id\":\"https://docs.deandesk.com/#organization\"},\"isPartOf\":{\"@id\":\"https://docs.deandesk.com#website\"}}]}\u003c/script>\u003cscript data-mint-head type=\"application/ld+json\">{\"@context\":\"https://schema.org\",\"@type\":\"WebSite\",\"name\":\"DeanDesk\",\"creator\":{\"@type\":\"Organization\",\"name\":\"Mintlify\",\"url\":\"https://mintlify.com\"}}\u003c/script>","siteName":"DeanDesk","nav":{"global":null,"tabs":[{"tab":"Documentation","groups":[{"group":"Get Started","pages":[{"title":"Welcome to DeanDesk","href":"/introduction"},{"title":"Institutions \u0026 Schools","href":"/getting-started/institutions-and-schools"},{"title":"Quick start","href":"/quickstart"},{"title":"First login","href":"/getting-started/first-login"},{"title":"Your account \u0026 family portal","href":"/getting-started/member-account"},{"title":"Understanding your payment","href":"/getting-started/payment-breakdown"}]},{"group":"School onboarding","pages":[{"title":"School setup, one step at a time","href":"/school-setup/index"},{"title":"1. School identity and branding","href":"/school-setup/school-identity"},{"title":"2. Enrollment and admissions","href":"/school-setup/enrollment"},{"title":"3. Courses and learning material","href":"/school-setup/courses-and-materials"},{"title":"4. Staff, learners and families","href":"/school-setup/people-and-families"},{"title":"5. Products, prices and payments","href":"/school-setup/products-and-payments"},{"title":"6. Website and content","href":"/school-setup/website"},{"title":"7. Test the complete experience","href":"/school-setup/test-and-launch"}]},{"group":"Institution Management","pages":[{"title":"Institution dashboard directory","href":"/institution/dashboard"},{"title":"Platforms and school setup","href":"/institution/platforms"},{"title":"Identity metadata","href":"/institution/metadata"},{"title":"Institution Stripe","href":"/institution/stripe"},{"title":"Institution settings","href":"/institution/settings"},{"title":"DeanDesk subscription and billing","href":"/institution/billing"},{"title":"Institution finance","href":"/institution/finance"},{"title":"Identities","href":"/institution/identities"},{"title":"Membership Management","href":"/institution/memberships"},{"title":"Support tickets and cases","href":"/institution/cases"},{"title":"Institution AI","href":"/institution/ai-chat"},{"title":"Shared Drive","href":"/institution/shared-drive"},{"title":"Projects and task lists","href":"/institution/projects"},{"title":"Integrations","href":"/institution/integrations"}]},{"group":"Setup","pages":[{"title":"Admin Dashboard directory","href":"/setup/admin-dashboard"},{"title":"Documents and acknowledgments","href":"/setup/documents"},{"title":"Website workspace","href":"/setup/website"},{"title":"Academic calendar","href":"/setup/calendar"},{"title":"Scheduling \u0026 calendars","href":"/setup/scheduling"},{"title":"Add users","href":"/setup/users"},{"title":"Create courses","href":"/setup/courses"},{"title":"Profile forms \u0026 metadata","href":"/setup/profile-forms"},{"title":"Forms","href":"/setup/forms"},{"title":"School branding","href":"/setup/branding"},{"title":"School configuration","href":"/setup/school-settings"},{"title":"File library","href":"/setup/files"},{"title":"DeanDesk AI for admins","href":"/setup/admin-ai"},{"title":"Payment setup","href":"/setup/payments"},{"title":"School support tickets","href":"/setup/support"}]},{"group":"Learning Management","pages":[{"title":"Course groups","href":"/lms/course-groups"},{"title":"Bulk enrollment","href":"/lms/bulk-enrollment"},{"title":"Waitlist manager","href":"/lms/waitlists"},{"title":"Grading standards","href":"/lms/grading-standards"},{"title":"Courses","href":"/lms/courses"},{"title":"Course not showing on a student's dashboard","sidebarTitle":"Missing course troubleshooting","href":"/lms/course-not-showing"},{"title":"Curriculum maps","href":"/lms/curriculum-maps"},{"title":"Assignments","href":"/lms/assignments"},{"title":"Surveys","href":"/lms/surveys"},{"title":"Gradebook","href":"/lms/gradebook"},{"title":"Attendance","href":"/lms/attendance"},{"title":"Live classes","href":"/lms/live-classes"},{"title":"Pages","href":"/lms/pages"},{"title":"Programs \u0026 events","href":"/lms/programs-and-events"}]},{"group":"Teaching a course","pages":[{"title":"Course sidebar tour","href":"/teaching/course-tour"},{"title":"Overview","href":"/teaching/overview"},{"title":"Materials","href":"/teaching/materials"},{"title":"Assignments","href":"/teaching/assignments"},{"title":"Surveys","href":"/teaching/surveys"},{"title":"Curriculum","href":"/teaching/curriculum"},{"title":"Announcements","href":"/teaching/announcements"},{"title":"Discussions","href":"/teaching/discussions"},{"title":"Chat","href":"/teaching/chat"},{"title":"Students","href":"/teaching/students"},{"title":"Attendance","href":"/teaching/attendance"},{"title":"Gradebook","href":"/teaching/gradebook"}]},{"group":"Student Management","pages":[{"title":"Off-boarding","href":"/sis/offboarding"},{"title":"Institution memberships in your school","href":"/sis/institution-memberships"},{"title":"Student records","href":"/sis/student-records"},{"title":"Delete a user","href":"/sis/delete-user"},{"title":"Rosters","href":"/sis/rosters"},{"title":"Admissions","href":"/sis/admissions"},{"title":"Billing \u0026 payments","href":"/sis/billing"},{"title":"Disciplinary records","href":"/sis/disciplinary-records"},{"title":"Volunteers \u0026 volunteer hours","href":"/sis/volunteers"}]},{"group":"Communication","pages":[{"title":"Emails","href":"/communication/emails"},{"title":"System emails","href":"/communication/system-emails"},{"title":"Announcements","href":"/communication/announcements"},{"title":"Chat \u0026 discussions","href":"/communication/discussions"}]},{"group":"Finance","pages":[{"title":"Review simulator","href":"/finance/review-simulator"},{"title":"Program attendees","href":"/finance/programs"},{"title":"Products","href":"/finance/products"},{"title":"Discounts","href":"/finance/discounts"},{"title":"Scholarship \u0026 financial aid rates","href":"/finance/financial-aid"},{"title":"Invoicing","href":"/finance/invoicing"},{"title":"Subscriptions","href":"/finance/subscriptions"},{"title":"Enrollments","href":"/finance/enrollments"},{"title":"Physical products \u0026 orders","href":"/finance/orders"},{"title":"Booking sessions","href":"/finance/bookings"},{"title":"Transactions \u0026 refunds","href":"/finance/transactions"},{"title":"Online processing fee","href":"/finance/online-processing-fee"},{"title":"Stripe configuration","href":"/finance/stripe"},{"title":"Time and payroll","description":"Compute staff pay per pay period from scheduled course sessions, set staff and course rates, and track payroll records.","href":"/finance/payroll"}]},{"group":"Reports \u0026 Analytics","pages":[{"title":"Student reports","href":"/reports/student-reports"},{"title":"Financial reports","description":"Review school payments, invoice balances, subscriptions, and financial exports.","href":"/reports/financial-reports"}]},{"group":"Integrations","pages":[{"title":"Ed-Fi export","href":"/integrations/edfi"},{"title":"MCP server","href":"/integrations/mcp"},{"title":"DeanDesk Sync","href":"/integrations/deandesk-sync"},{"title":"Zoom \u0026 Google Calendar","href":"/integrations/zoom-google-calendar"}]},{"group":"Mobile App","pages":[{"title":"Mobile app","href":"/mobile/overview"},{"title":"Push notifications","href":"/mobile/push-notifications"}]}]}]},"title":"Student reports - DeanDesk","buildId":"dpl_GnxaU9nEer7XK27kw3dpfPrs9geh","deploymentId":"dpl_GnxaU9nEer7XK27kw3dpfPrs9geh","dynamics":["07c022d89b","a74be98ba7","a9bb46feb3"],"chunks":["Frame-C1EX3v38.js","DynamicMarkdown-BPGty-u8.js","zoom-image-lightbox-Cv5hibpS.js","PlusIcon-owOTCErD.js","lightbox-handle-r17bVUz3.js","Markdown-DBoyz2JY.js","clsx-BTaOLP1x.js","lib--scc4DXi.js","lib-B8HbPgcC.js","html-void-elements-mCSPHezU.js","dist-BFj0_khV.js","katex-YMM-FMeD.js","marked.esm-CZWythHk.js","AssistantPageLink-BXlqNIdH.js"]}